
How to configure Vasion PrinterLogic in Sage X3 SaaS
With PrinterLogic, Sage X3 SaaS allows you to execute print jobs on physical on-premises printers without requiring a VPN connection between the Sage Cloud service and the customer's on-premises network.
You can read more about the PrinterLogic product in the documentation provided by Vasion on their website.
Prerequisites
To run PrinterLogic with Sage X3 SaaS, you need:
-
A customer PrinterLogic license
-
This provides access to the PrinterLogic portal instance if the partner has been granted access with RBAC configuration (if required).
-
The customer license includes the core license to use PrinterLogic and extra advanced security addons.
-
-
A customer’s Sage X3 deployment provisioned with Sage X3 SaaS
Important
Before using PrinterLogic with Sage X3 SaaS, you need to raise a request to access the printing services.
To do this, log a ticket with L2 requesting the configuration of PrinterLogic on the respective Sage X3 deployment.
When the request is performed, you receive:
-
A unique URL generated for the instance.
-
The instance / authorization code provided by Vasion.
-
The Sage X3 deployment where print services will be available.
Global architecture of PrinterLogic with Sage X3 SaaS
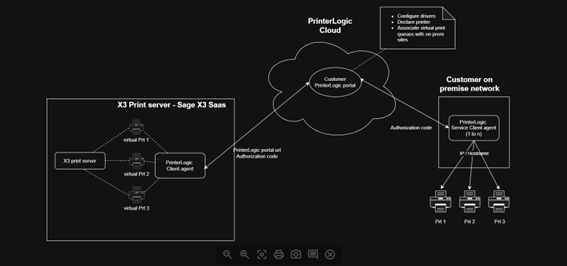
The components
PrinterLogic cloud portal: As part of the PrinterLogic subscription, each customer has access to the administration portal where they can setup the link between their on-premises printers and the Sage X3 Print server.
Sage X3 Print server: A Windows machine running the Sage X3 Print server (one-to-many) for the Sage X3 SaaS customer instance. Sage allows partners to automatically install the PrinterLogic client application to connect to the customer’s PrinterLogic cloud portal. This makes the customer’s on-premises printers accessible to the partner as if they were directly connected to the Sage X3 Print server.
Customer on-premises: The customer installs one or more PrinterLogic service client agents. These lightweight applications run on a host connected to physical printers and act as a relay between the customer network and PrinterLogic cloud print requests.
Sage X3 Syracuse server: Component where is configured the destination of the print. It can display the list of printers of the Sage X3 print server as a valid destination even if the printers are not directly connected to the Sage X3 print server.
How to setup the off-site printing for Sage X3 SaaS
-
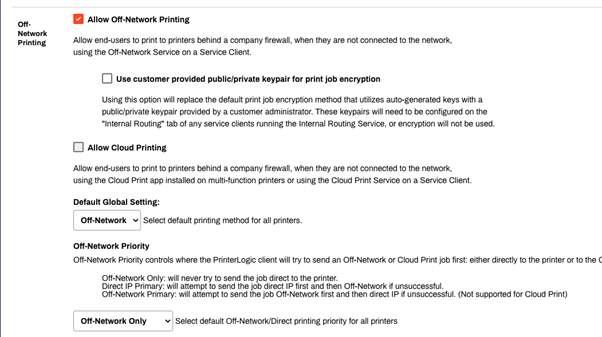
Enable off-network printing for your PrinterLogic account
Log into the PrinterLogic portal on the following url: https://<customerinstance>.printercloud5.com/admin/, where <customerinstance> corresponds to the name of your customer instance.
Note:<customerinstance> corresponds to the name of your customer instance.
printercloud5 is region-dependent (example: Europe)
After you login, go to: Tools > Settings > General and select Activate Off-Network Printing.
Note:The default global setting should be set to Off-Network.

-
Create the object hierarchy in the PrinterLogic portal
In the admin portal, create:
-
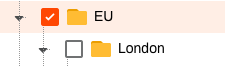
A root folder
-
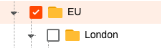
Optional sub‑folders (e.g., per customer location)
-
-
Generate an access code in the PrinterLogic portal
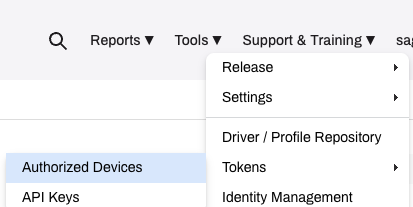
Go to: Tools > Tokens > Authorized Devices to generate an access code that allows you to associate the PrinterLogic client application with the PrinterLogic cloud portal.

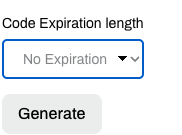
Before you select the Generate button, make sure No Expiration is selected in the dropdown menu.

Once the code is generated, please save it. It will be required in the next steps.
-
Install the service client agent on-premises
Note:This step can be performed one or several times depending on the customer network infrastructure. If, for instance, the customer has two isolated on-premises sites that require the printer to be exposed to Sage X3, two service clients would have to be installed and declared in the PrinterLogic portal.
You can download the installer of the service client in the PrinterLogic portal in the following manner:
-
In the Admin console, go to: Tools > Settings > Client
-
Scroll down to the Deployable Client Packages section.
-
Select the file type for the desired package depending on your operating system.
You can manually run the .msi installer or a command line to link it to the PrinterLogic portal using the following command:
msiexec /i PrinterInstallerClient.msi /qn HOMEURL=https://<HOME_URL_HERE> AUTHORIZATION_CODE=<AUTH_CODE_HERE>
Where <HOME_URL_HERE> is the PrinterLogic portal and <AUTH_CODE_HERE> corresponds to the previously generated (and saved) access code.
You can read more about the client installation on the documentation provided by Vasion.
-
-
Register the service client in the PrinterLogic portal
-
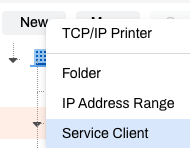
In the PrinterLogic portal admin page, select the Print option from the menu on the left. In this menu, you need to create a new service client in the folder hierarchy you are in.
-
Select Service Client to start the process.

-
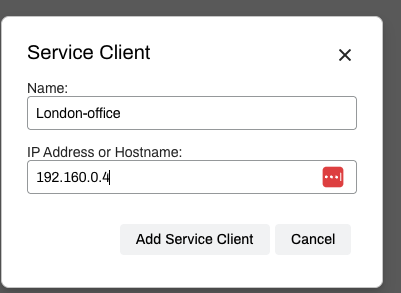
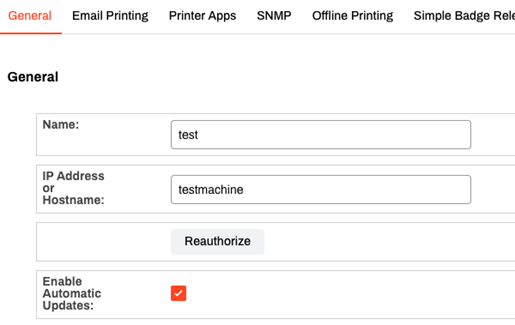
Fill in the name and the IP Address of the installed machine.
-
Select Add Service Client.

-
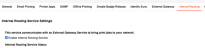
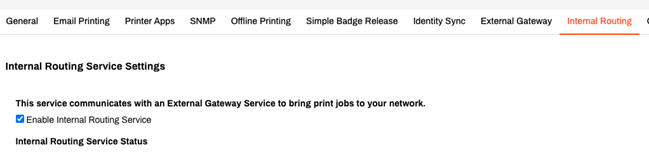
Once a new service client has been created, you can access the details page of the service client. In the details page of the service client, go to the Internal Routing tab and activate the Enable Internal Routing Service checkbox.
-
You can refresh the configuration in two different manners:
-
On the on-premises machine by selecting in the system tray Refresh configuration.
-
In the General tab of service client by selecting the Reauthorize button.

-
After a few seconds, in the Internal Routing tab, you should the status update to online.
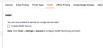
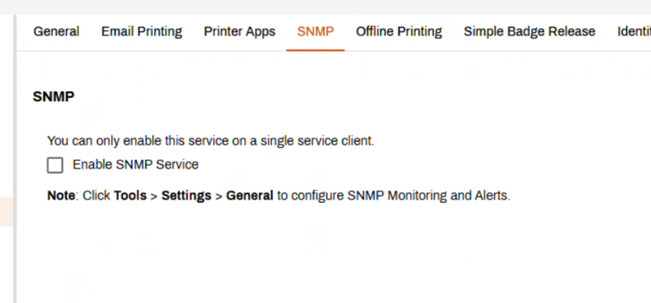
Note:Optionally, you can enable SNMP on the service client. This will make the printer queue visible from the PrinterLogic admin console status tab of the printer object.
You can read more about service clients in the documentation provided by Vasion.
-
-
Create an automatic deployment group for the Sage X3 Print server
Note:This step allows you to make sure every new Print server instance created on Sage X3 SaaS for this customer automatically has the printers available.
-
In the PrinterLogic portal admin page, select Print in the left menu to create a new service client at the root folder position.
-
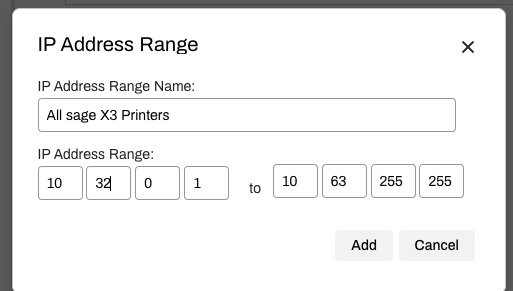
Select the following menu: New > IP Address Range.

-
Name it All Sage X3 Printers and set the following IP Adress Range: 10.32.0.1 > 10.63.255.255.
-
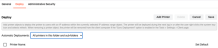
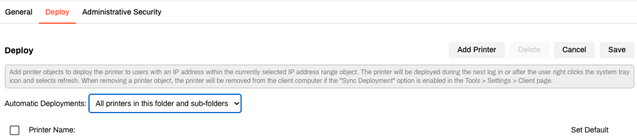
In the Deploy tab, select All printers in this folder and sub-folders in the Automatic deployments dropdown.
-
Select Save.
-
-
Add printers
-
In the PrinterLogic portal admin page, select Print in the left menu to create a new service client in the folder hierarchy you are in.
-
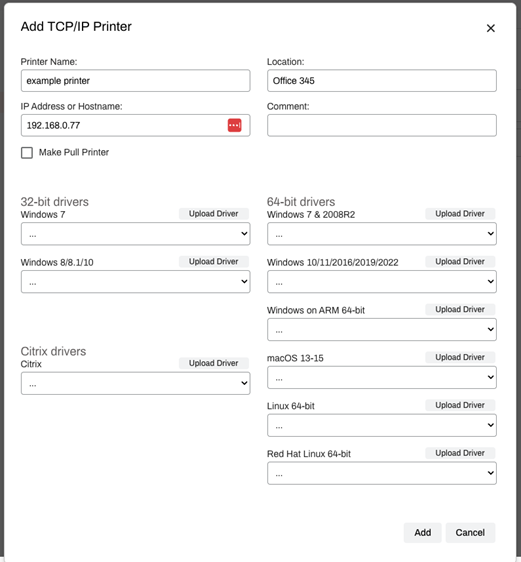
Select the following menu: New > TCP/IP Printer.
-
Set the printer’s name and the IP Address.
 Note:
Note:The IP Adress should correspond to the local printer and be accessible from the on-premises service client previously configured.
-
Upload the printer drivers. To upload the drivers, you need to have the PrinterLogic Chrome extension installed on the host server. Make sure the extension is connected to the PrinterLogic portal.
Note:You do not need to run the extension from the machine that hosts the service client. However, to install a Microsoft Windows driver, you must be using a Microsoft Windows machine. The same applies to other operating systems.
-
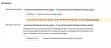
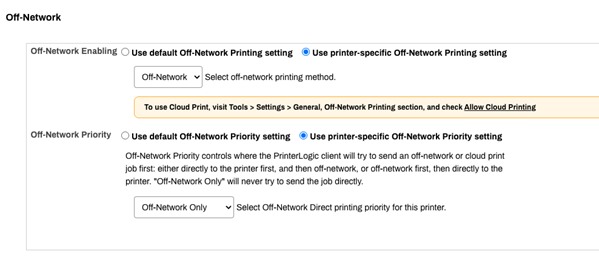
Save the printer. On the Printer Detail page, select the Off-Network tab and select Use printer-specific Off-Network Printing setting with Off-Network for the Off-Network Enabling of the printing method list. Do the same for the Off-Network Priority.
-
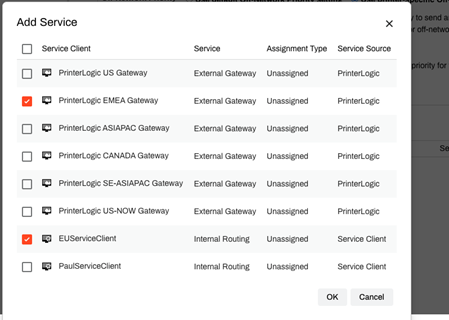
Finaly, associate the printer with a gateway and to the previously created service client. Do this by selecting the Add button in the Off-Network tab of the Printer Detail page. After, select:
-
The gateway corresponding to the customer’s office location.
-
The service client that can reach the printer.

-
-
You can perform a test by selecting the Test button to validate both the gateway and the service client connected to the PrinterLogic portal.
-
You can read more about driver management in the documentation about PrinterLogic provided by Vasion.
-
Configure Sage X3 SaaS
Installing PrinterLogic on the Sage X3 Print server
For now, the manual configuration is done by accessing the Print server in RDP and installing the PrinterLogic client:
msiexec /i PrinterInstallerClient.msi /qn HOMEURL=https://sagepoc.printercloud5.com AUTHORIZATION_CODE=xxx
Using the printers in Sage X3
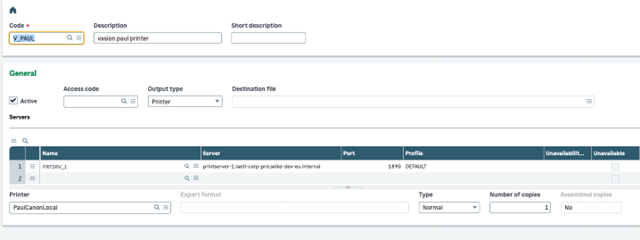
Once the setup is done, you can connect to Sage X3 and create a new print destination. You can select the correct printer with the lookup menu.
Troubleshooting
To see the list of machines connected to the PrinterLogic cloud, you can access the following menu in the PrinterLogic portal admin page: Report > Workstation. In this page, you can see the machines where the PrinterLogic client is installed.
The machines who include \sage in its username and who have an IP address starting with 10.42 correspond to the Sage X3 Print servers. If they are displayed in the list of machines connected to the PrinterLogic cloud, it means the printer is installed automatically in these machines.
You can also check the status individually of each machine by checking the status of the printer in the Status tab of the Printer Detail page.
Logs are available in the installation folder of the service client side to check the status of the PrinterLogic client and the status of the off-network service.
For now, the automatic deployment of PrinterLogic is not possible from within the Sage partner portal. In the meantime, please contact Sage Support with your home URL and access code for more information.