To launch this separate installation, double-click the '.jar' file in the SafeX3Mongodb folder.
|
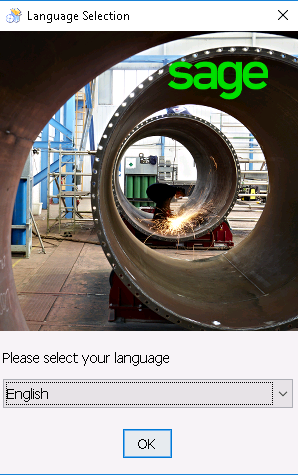
The first screen allows you to choose the installation language:
|
|
|
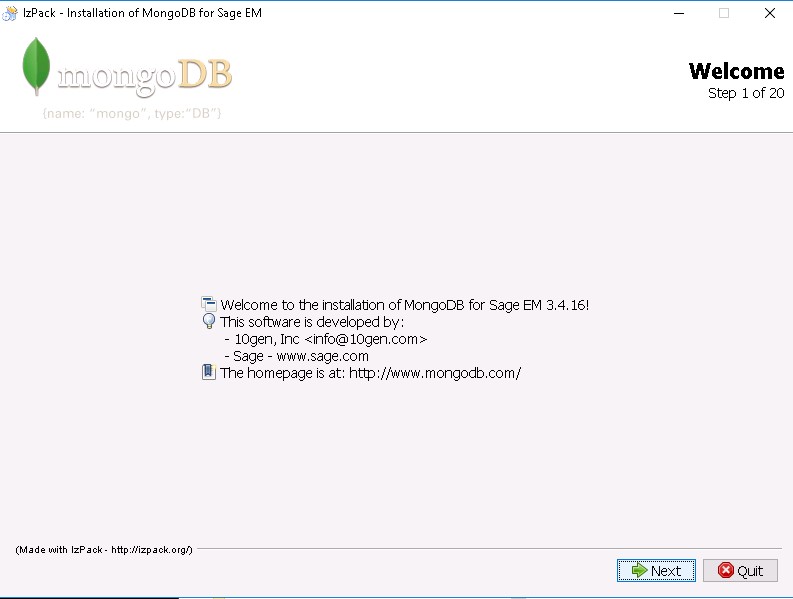
The second screen is a welcome page:
|
|
|
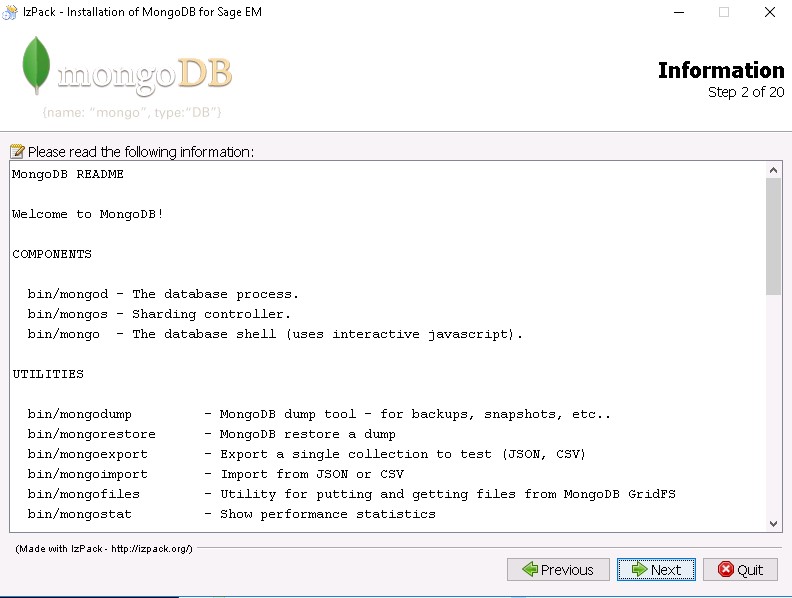
This screen is followed by a description page of the components that will be installed:
|
|
|
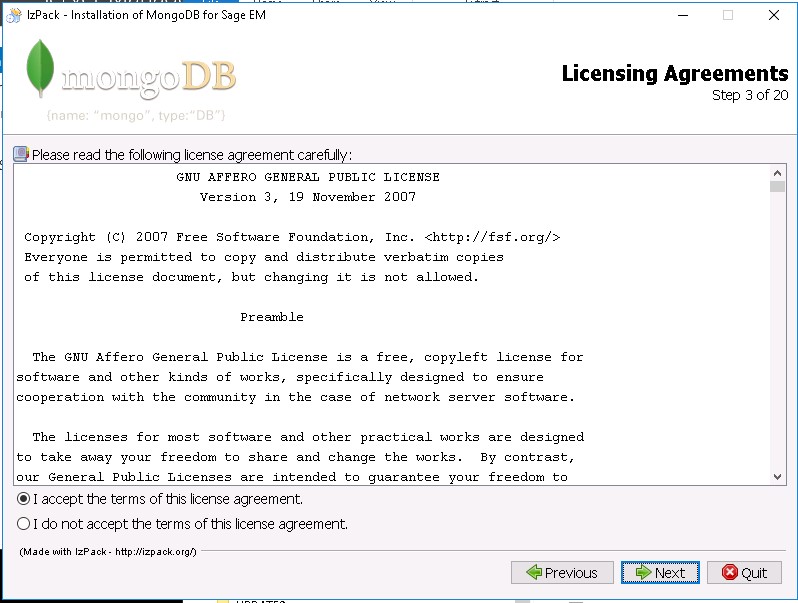
The next screen is the license agreement that must be accepted if you want to continue the installation:
|
|
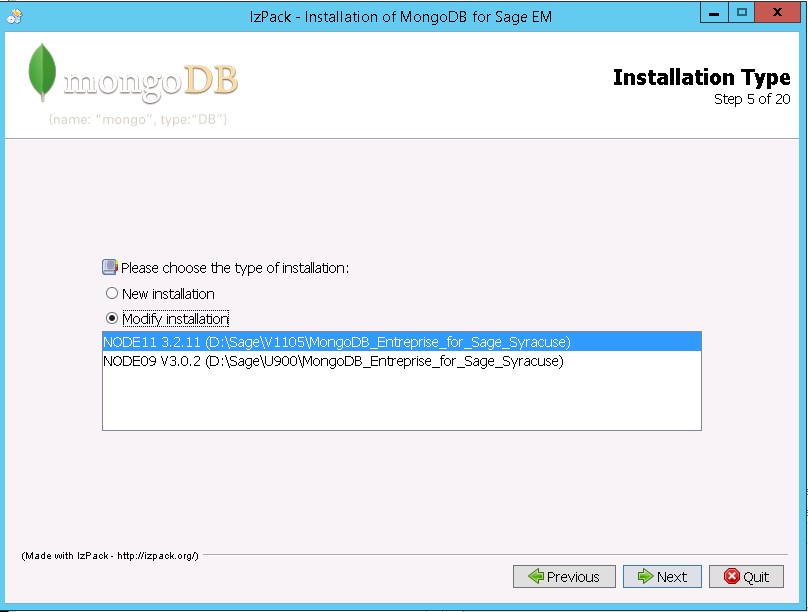
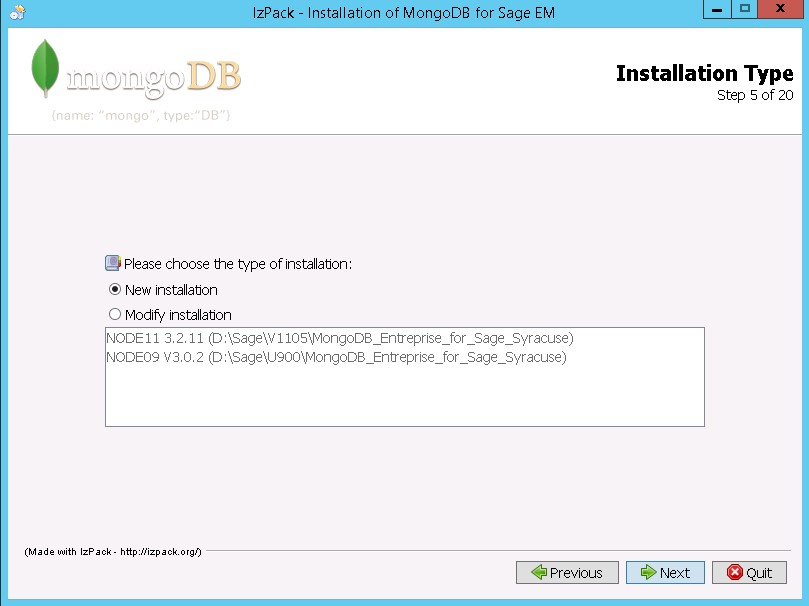
On the next screen, you choose between proceeding with a new installation, or changing the characteristics of an existing installation. The new installation should be chosen:
- The first time the platform is installed on a server.
- If you want to switch from a manual installation (done in 7.0) to an automatic installation.
- If you want to switch from an installation done in 8.0 to an installation that manages security through certificates.
Changing the characteristics of an old installation is possible because, at a given point of the installation, it is possible to connect to the previous MongoDB instance and to transfer the data to the newly created instance.
|
|
|
Let us first see what happens when a new installation is chosen.
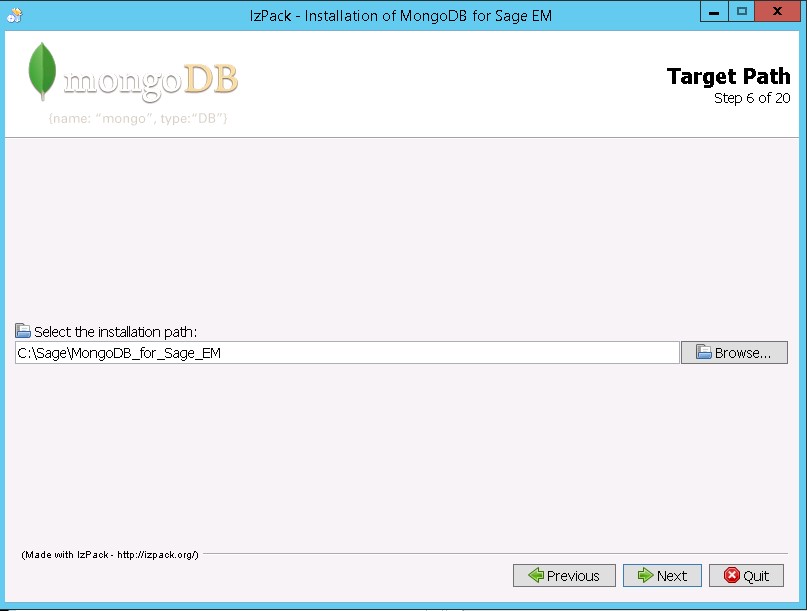
The setup dialog box asks for the root directory associated with the MongoDb installation files. If the directory does not exist, it is possible to create it:
|
|
|
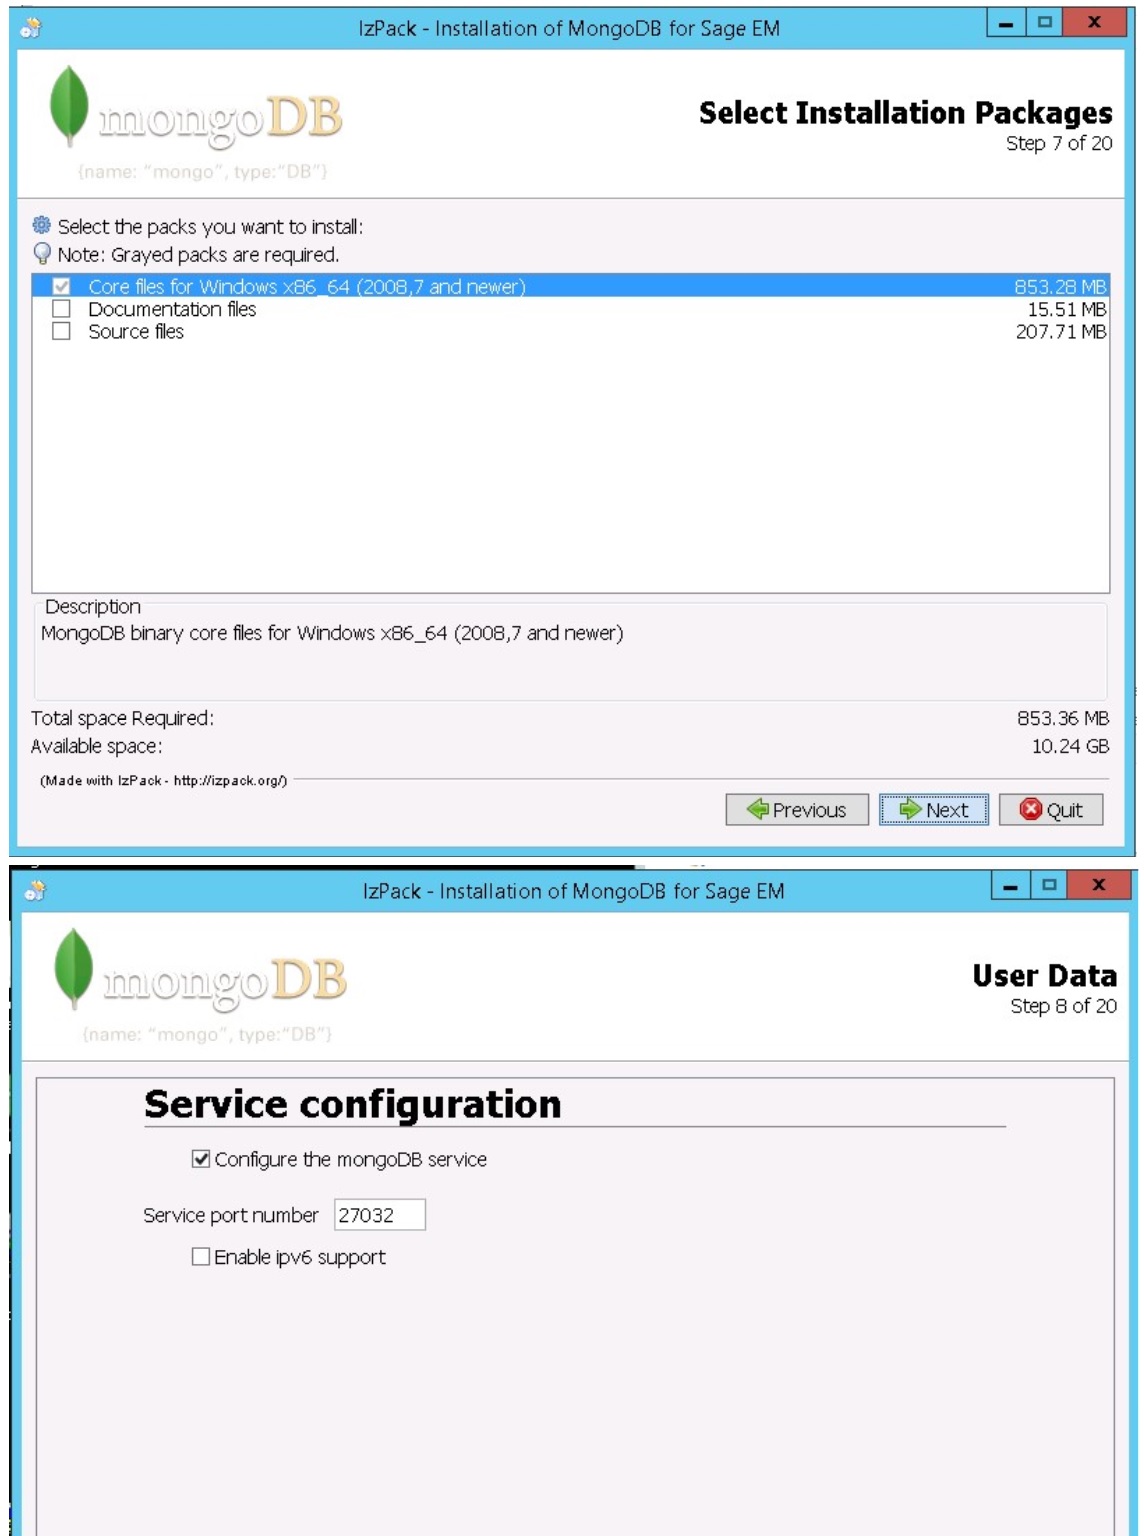
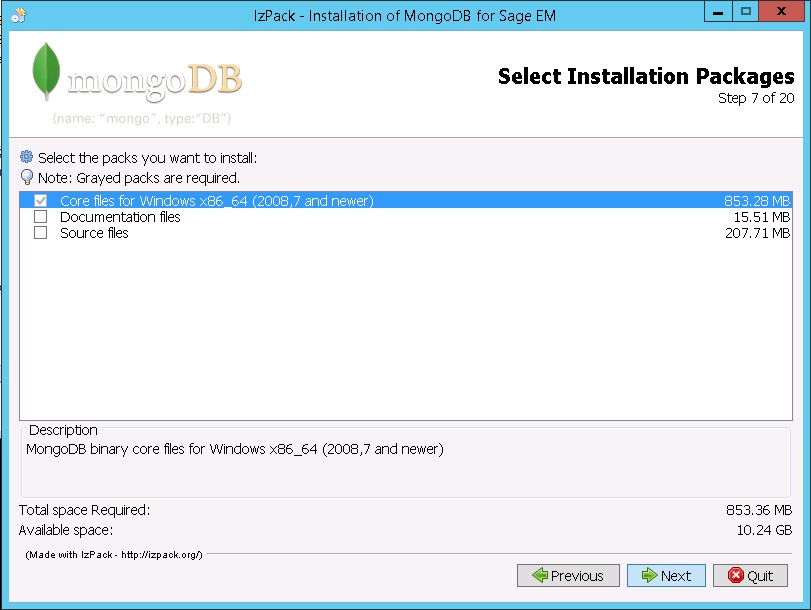
The packages to be installed can be selected. The only mandatory package contains the core file to run MonoDB:
|
|
The information needed to configure the service are requested, if the corresponding check box is selected (recommended). The information entered is the following:
- The MongoDB node identifier (must be unique on a server).
- The different path for the files related to the MongoDB installation. By default, sub-directories of the installation directory options are: `data` for the data files, `logs` for the log files, and `config` for the configuration files.
- The service port number used to connect to MongoDB (27017 by default).
- A final check box allows you to enable ipv6 server. Selecting 'True' supposes that the server itself uses ipv6 address configuration. If this is not the case, do not check the box.
|

|
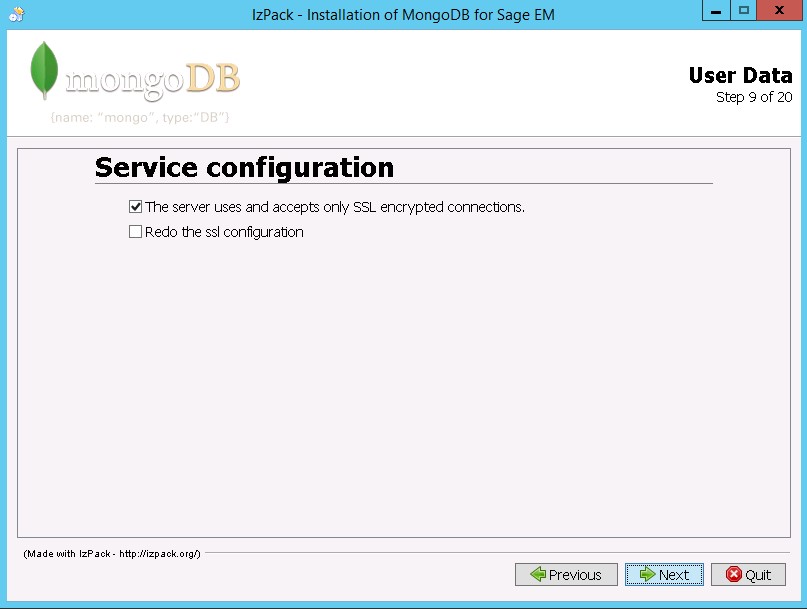
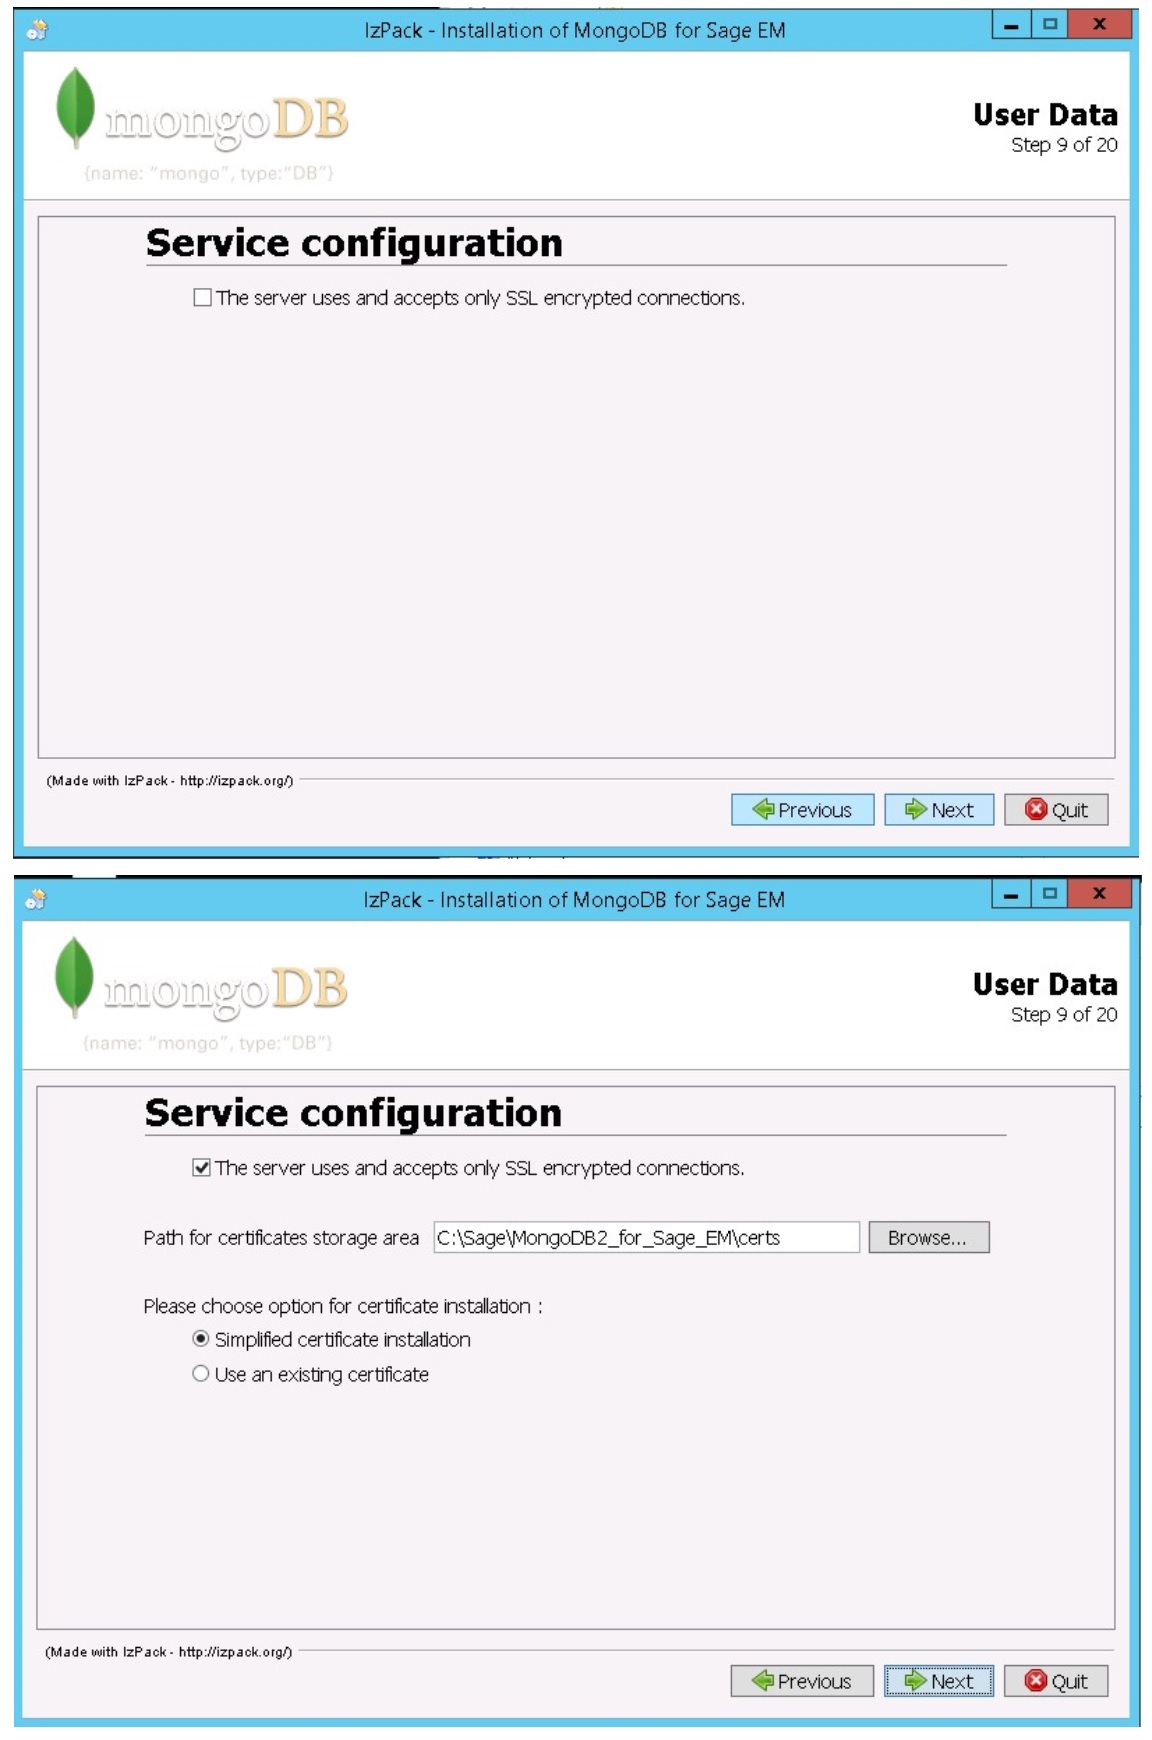
The next step is related to the service configuration. If the `The server accepts only SSL encrypted connections` check box is not selected, nothing else needs to be entered here.
But if the check box is selected, you need to set up the certificate that is used for the secured connection. Two options exist in this case:
- Either you create certificates with an automated procedure.
- Or you use existing certificates.
Let us see what happens in the first case.
|
|
|
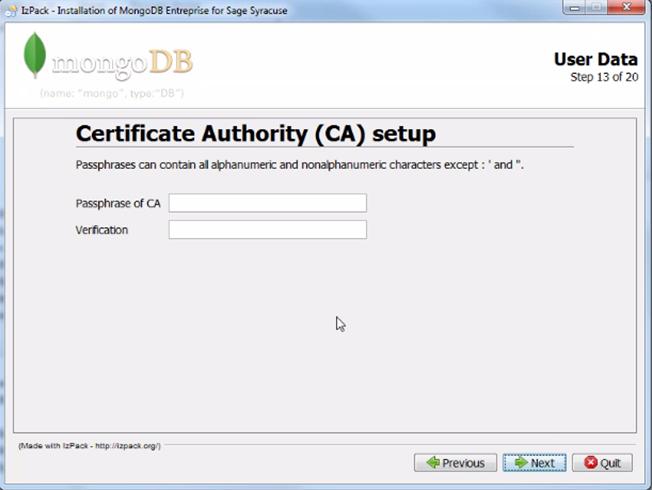
The first information to be entered here is the passphrase associated with the master certificate (CA) that is created:
|
|
|
Then, the information related to the data that defines the connection certificate is entered:
|
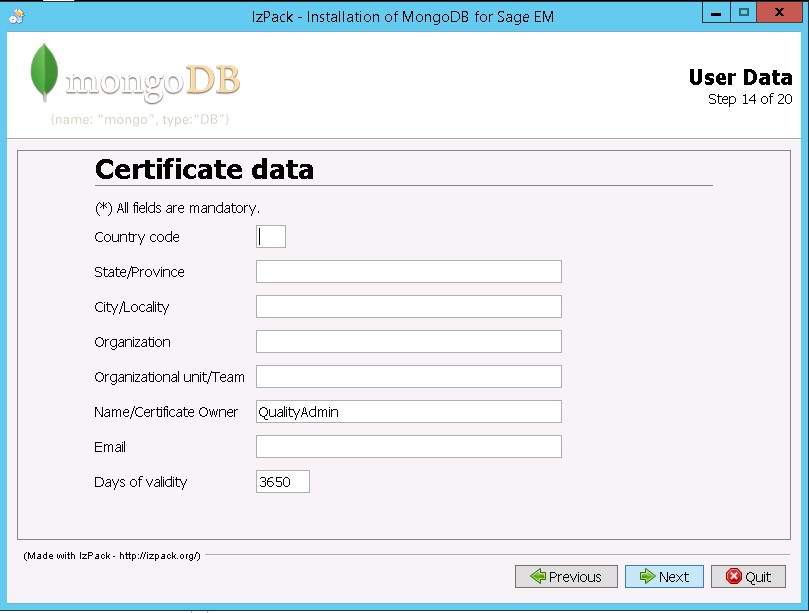
|
|
You can now enter the passphrase associated with the connection certificate, as well as the server associated. Be sure that the server path must be the complete path including the full qualified domain name, otherwise further connections are refused:
|
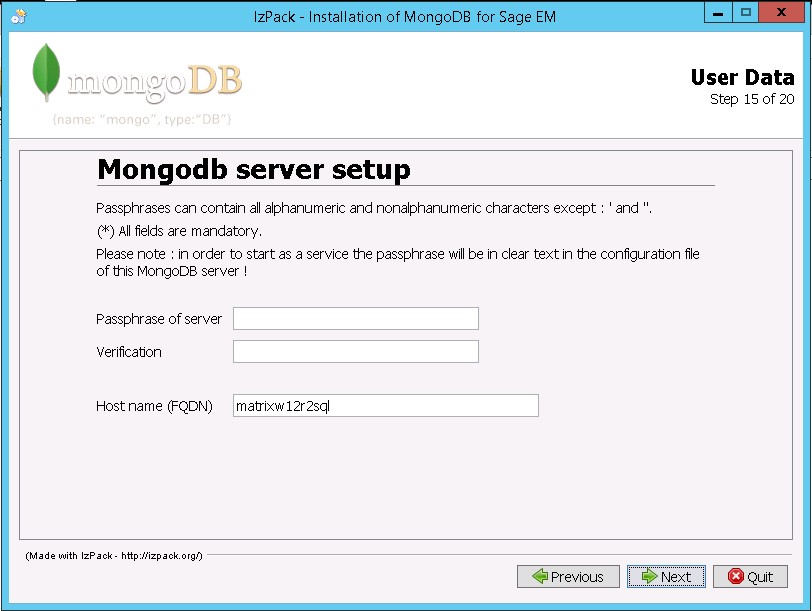
|
|
The next step allows you to initialize the MongoDB database from another instance. If the check box is not selected, nothing else has to be entered; if the check box is selected, it corresponds to the case where an old version was present (V7 or V8 installed without certificate). The data associated to the previous version is then transferred as soon as the right host name and the corresponding port are entered:
|
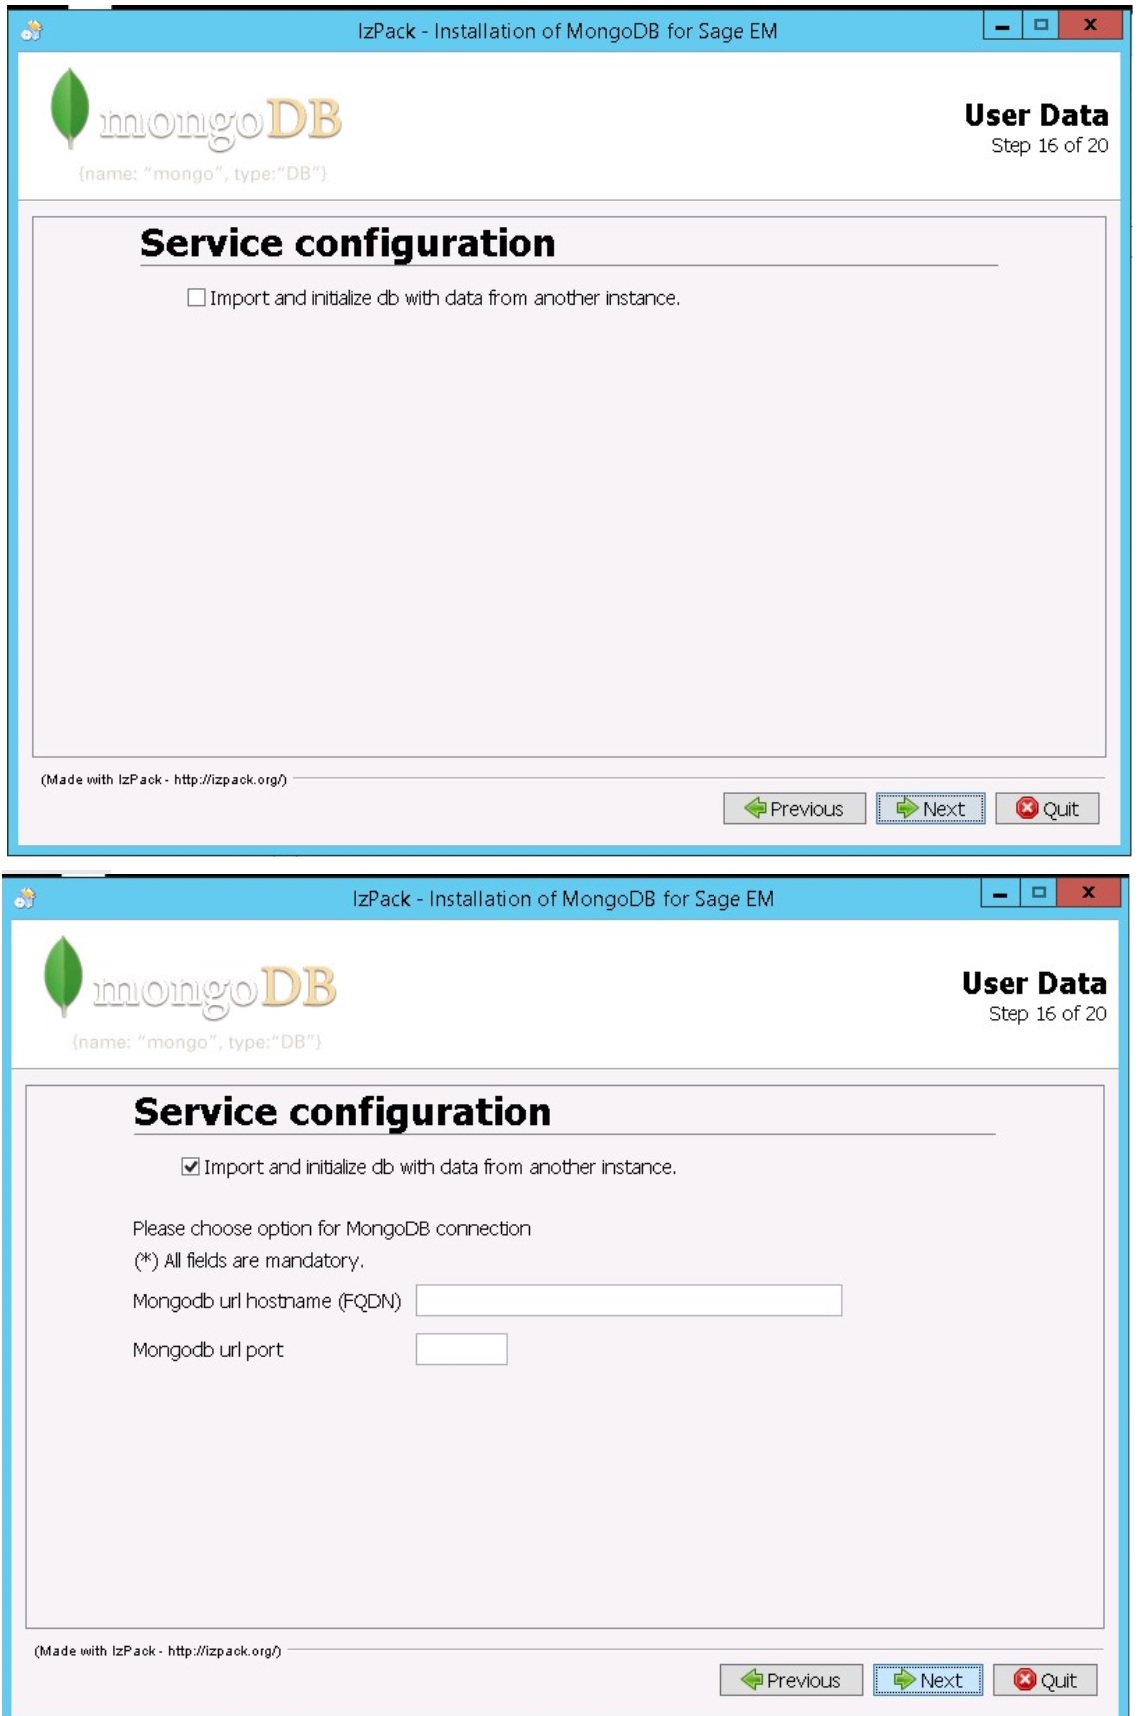
|
|
At the next step, the screen summarizes the options entered for this installation. Check them carefully and go back if anything was incorrectly entered.
|
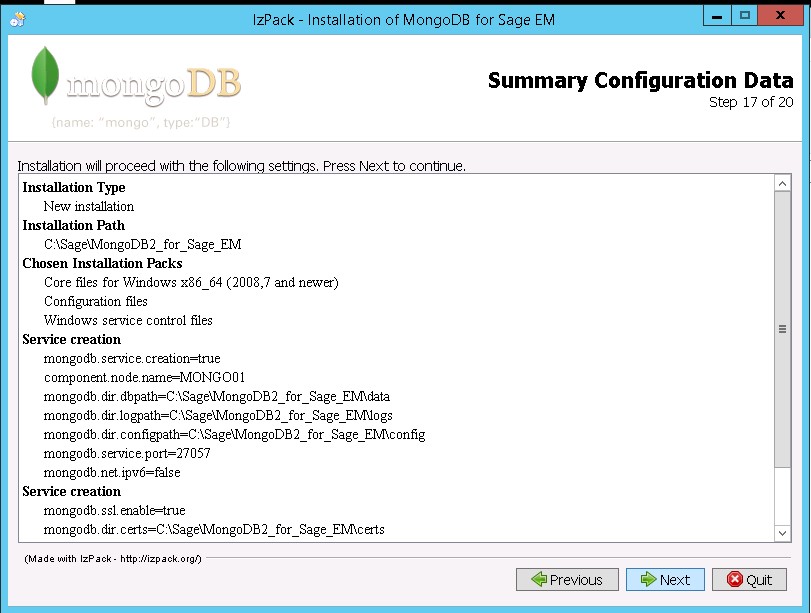
|
|
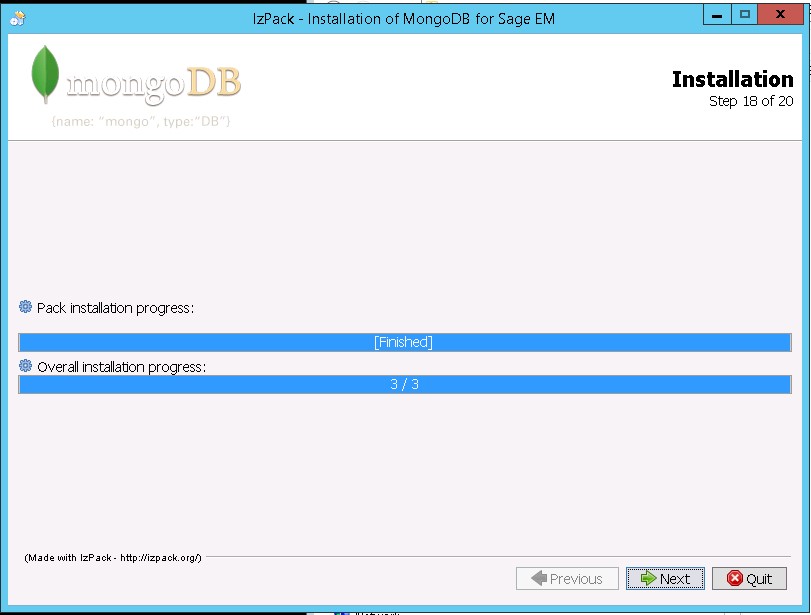
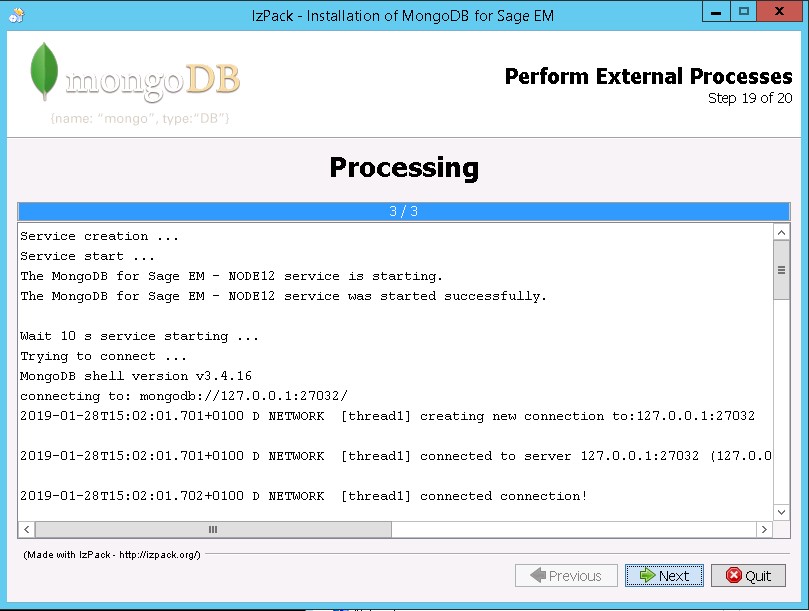
Otherwise, the installation runs with several steps. At the end, a summarized page displays what has been done (installation plus a test of connectivity):
|
|
|
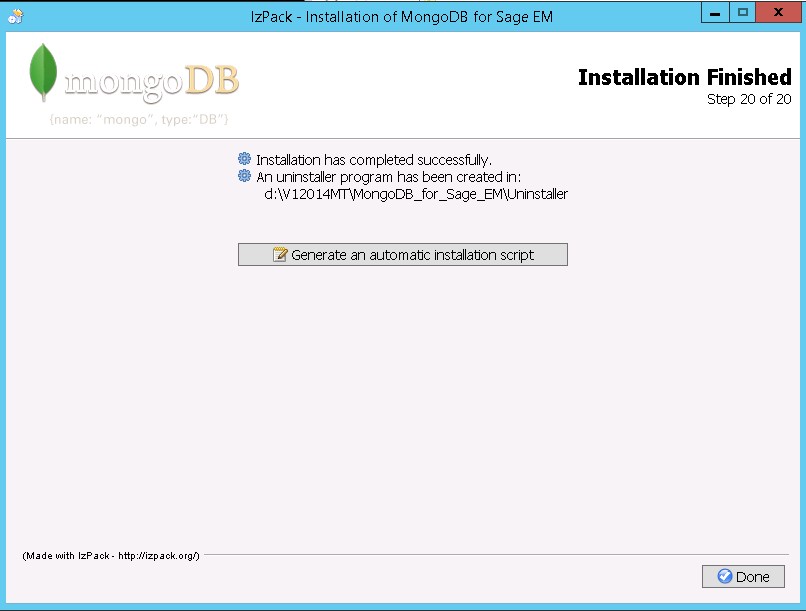
The installation is now finished. Note that an uninstallation script has been generated, that can be used if you want to uninstall the software. A last option is available that generates an automated installation script. This script is an XML file that stores the answers given to all the previous dialog boxes. This file can be modified and reused in order to run a setup automatically, for example on another server.
Automatically running an installation script associated with an XML answer file (let us call it responses.xml) is done by launching the following command (in a shell with the path to java.exe set, setup.jar being accessible):
`java -jar setup.jar responses.xml`
|
|