Creating payment entry types
Open: Setup > A/P-A/R accounting > Payment entry types (GESTPY)
For each bank file definition you create, you also need to create new payment entry types.
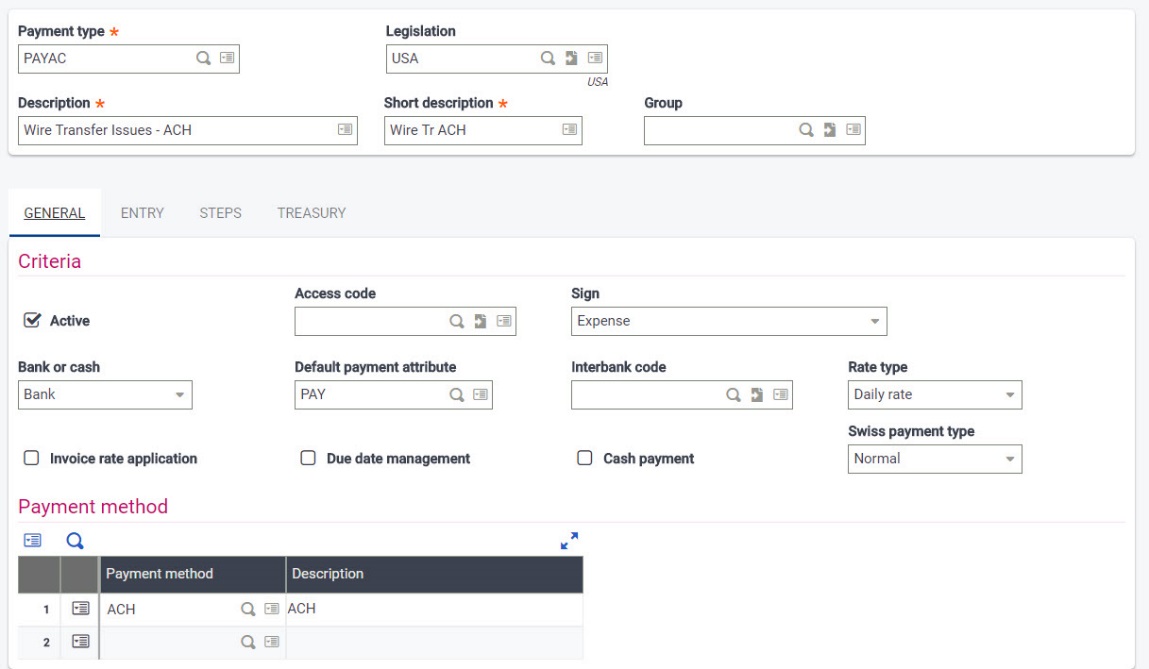
For ACH or MTS entry types
- Enter a Payment type.
- Set the Legislation to USA.
- Enter a Description and a Short description.
- Make sure the Active check box is selected.
- For Sign, select Expense.
- In the Payment method grid, enter or select ACH or MTS based on the bank file format you created.
For example:
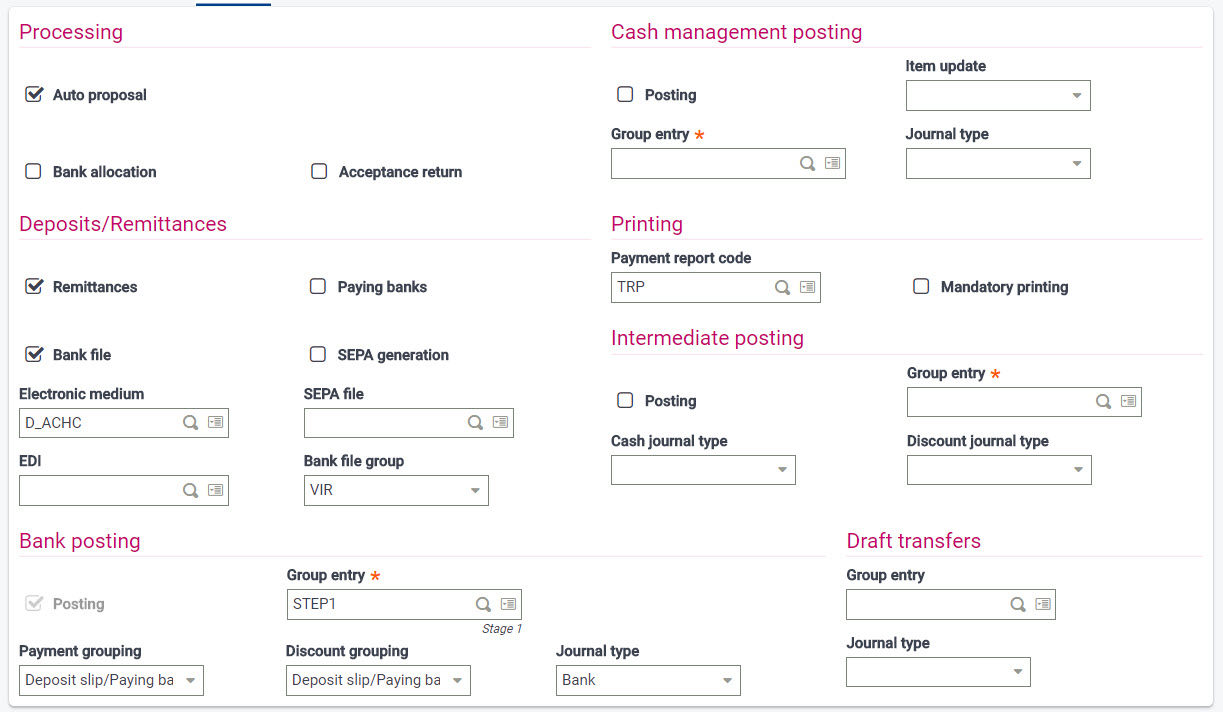
- Under Processing, select the Auto proposal check box.
- Under Deposits/Remittances
- Select the Remittances and Bank file check boxes.
- Enter the bank file format for Electronic medium; for example, D_ACHC or D_MTS.
- Under Printing, for Payment report code, enter TRP.
- Under Bank posting
- Set Group entry to STEP 1.
- For Payment grouping and Discount grouping, select Deposit slip/Paying bank.
For example:
For CHK entry types
- Enter a Payment type.
- Set the Legislation to USA.
- Enter a Description and a Short description.
- Make sure the Active check box is selected.
- For Sign, select Expense.
- In the Payment method grid, enter or select CHK based on the bank file format you created.
- Select the Check number check box, but do not select Mandatory for this field.
- Under Processing, select the Auto proposal check box.
- Under Deposits/Remittances
- Select the Remittances and Bank file check boxes.
- Enter the bank file format for Electronic medium; for example, D_CHK.
-
Under Printing, for Payment report code, enter CHQ.
- Printing checks is mandatory; the check number is populated before the file is generated.
- Under Bank posting
- Set Group entry to STEP1.
- For Payment grouping and Discount grouping, select Deposit slip/Paying bank.