Using revenue recognition
You can calculate the recognized revenue when a performance obligation is met. There are two functions available to calculate, validate, and then post the recognized amount. In the Revenue recognition function (GESREVRECV), you can generate entries for a single revenue recognition code and project. When you need to generate multiple projects, use the Revenue recognition validation function (GESREVRECW) to process entries in a workbench format.
Standard workflow
Generating the financial snapshot
Open: Projects > Projects > Snapshots > Financial snapshots
Before calculating revenue recognition for the period, you should generate a financial snapshot for the project and select the Revenue recognition check box. This ensures that you have the most up-to-date values for any of the project-related calculations such as Estimated cost at completion and the subsequent calculations.
There are three parameters available in the TC chapter, PJM group to synchronize the project-related values with the revenue recognition process. You can use these parameters to update your project estimates when extracting the financial snapshot selected for revenue recognition to ensure that you have the most up to date estimates when calculating revenue recognition.
-
ESTPRGSYNC - Updated est. progress/snapshot
-
ESTREVSYNC - Updated est. revenue/snapshot
-
FINOVERSYNC - Updated fin. status/snapshot
Creating the revenue recognition record
Open: Financials > Closing processes > Revenue recognition > Revenue recognition
In the Revenue recognition function (GESREVRECV), you use the rules you created to begin the revenue recognition process.
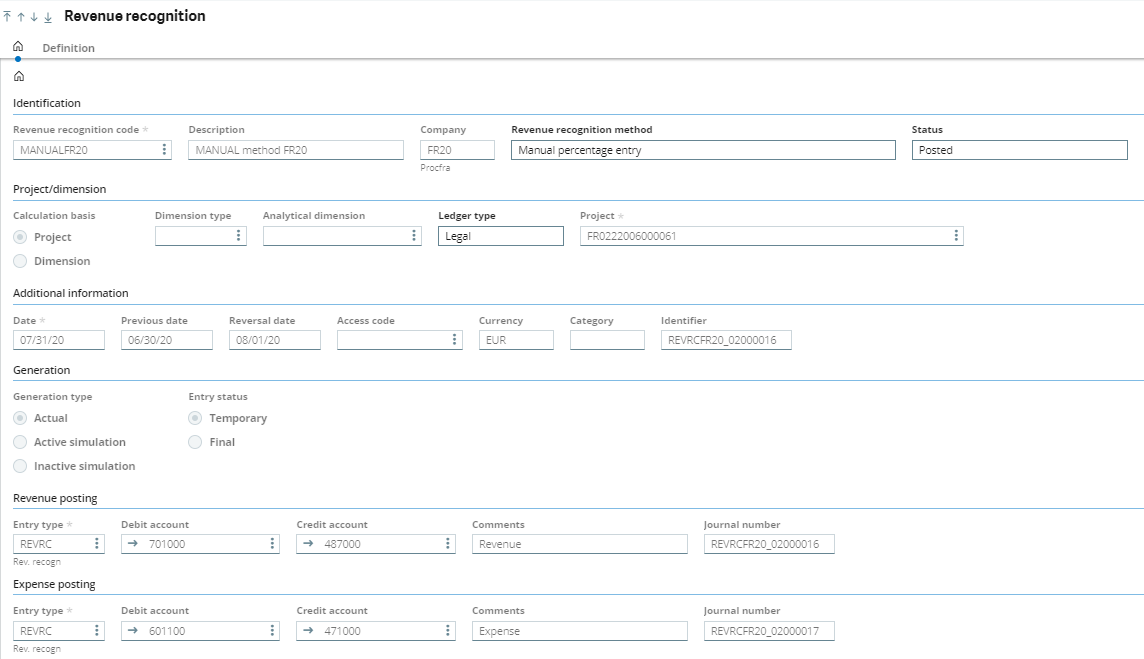
When you enter a code in the Revenue recognition code field, the Description, Company, Revenue recognition method, and Calculation basis fields display the settings from the revenue recognition rule.
If the Calculation basis is set to Project, select the project and date you want to calculate the revenue recognition for.
If the Calculation basis is set to Dimension, select the analytical dimension and date you want to use to calculate the revenue recognition. The related project value displays if there is an existing link.
When launching a calculation from a revenue recognition rule that is dimension-based, you still need to enter a project value to calculate the other column types. Otherwise, an undefined value is detected and the calculation cannot process. Only actual column types are project- or dimension-based; other column types are project-based only.
The suggested project list is filtered according to the dimension type in the validation screen, but there is still a consistency control with the revenue recognition rule. If a project entered following the analytical dimension is not consistent with the rule, you see this error message:
"[Project code]: Revenue recognition code is not assigned. Use is prohibited."
When you enter the date, remember that revenue can be recognized at any time, but the relevant period end date and posting date are always used to determine the data used in the calculation.
The reversal date defaults to the first day of the following period. This date is important to generate the reversal journal entry.
The Access code value defaults according to the rules, but can still be modified on the validation screens.
The Currency and Category fields display values from the project and cannot be modified.
The Identifier field value is created when you validate and is assigned to the relevant financial snapshot.
The Status field displays the status for the current revenue recognition calculation. There are five statuses:
-
To be processed: You created the record, but it is not yet calculated.
-
Awaiting validation: You calculate the amounts.
-
Validated: You validated the amounts and they can no longer be adjusted.
-
Posting simulation: You posted the record using a simulation generation type (active or inactive).
-
Posted: The amount is posted to the general ledger.
Posting options
You can create the journal entry by selecting a Generation type:
Actual: This generates a journal entry integrated into the balance, so it is visible in the inquiries and printouts. The related entry status depends on the FRADGI - French fiscal regulation parameter (TC chapter, CPT group) setting for the company:
Yes: The Entry status is Final.
No: The Entry status is Temporary.
Active simulation: This generates a journal entry integrated into the balance, so it is visible in the inquiries and printouts. The related Entry status is forced to Temporary.
Inactive simulation: This generates a journal entry not integrated into the balance and not visible in inquiries and printouts. The related Entry status is forced to Temporary.
You can update these values if necessary, provided that for a simulation journal entry generation, the entry type has Simulation selected and for an actual journal entry generation, the entry type has Actual selected. The entry type and document type combination determines the journal code and journal number used for posting.
Comments can be entered any time before validation. These comments display in the Default description field in the journal entry. You are now able to create your revenue recognition record. The status of your record is To be processed.
Calculating amounts
After creating the revenue recognition record, click Calculate to generate the calculated amounts.
Depending on your parameter settings and projects, you could receive warnings that the financial snapshot has not been generated or that temporary journals have been found in the calculation period. In each warning message, you can proceed with the calculation or cancel it.
"No financial snapshot flagged for Revenue recognition. Proceed?"
"Temporary journals have been found. Proceed?"
When the calculation finishes, the status changes to Awaiting validation.
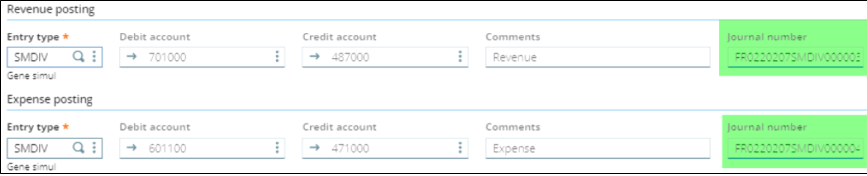
The debit and credit accounts from the Revenue posting and Expense posting sections display the values.

In the example grid below, several amounts are in bold because they will be posted to the general ledger.
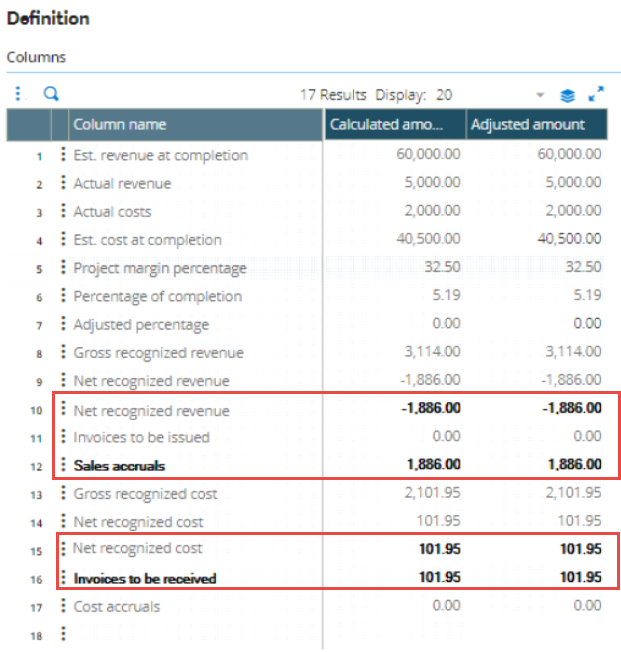
The Net recognized revenue calculated is a negative amount and therefore populates the Sales accruals column type.
The automatic journal code defined in the GAURSA - Rev. rec. revenue accruals parameter (TC chapter, REV group) is RRCSA.
At the line level for the RRCSA automatic journal, the Accounting codes section defaults to the account on the first line (debit account).
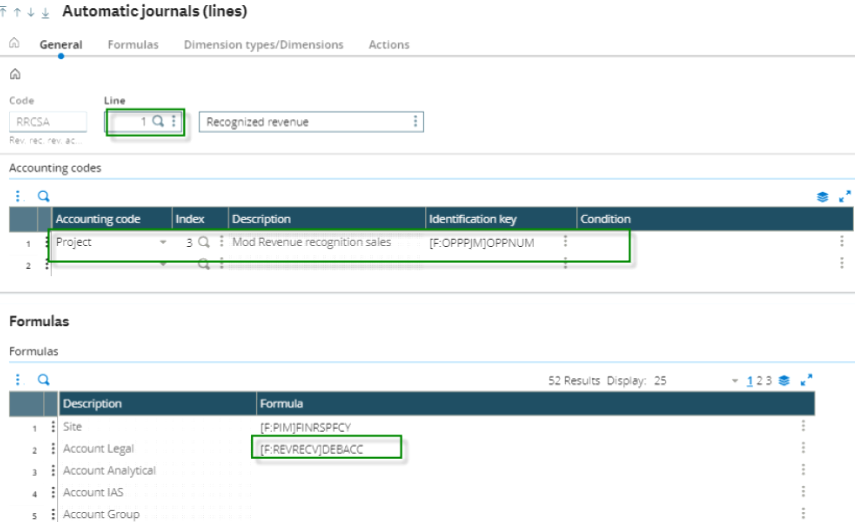
In the Accounting codes function (GESCAC), based on the company transaction type, the account defined on line 3 (in this example 701000) is populated.
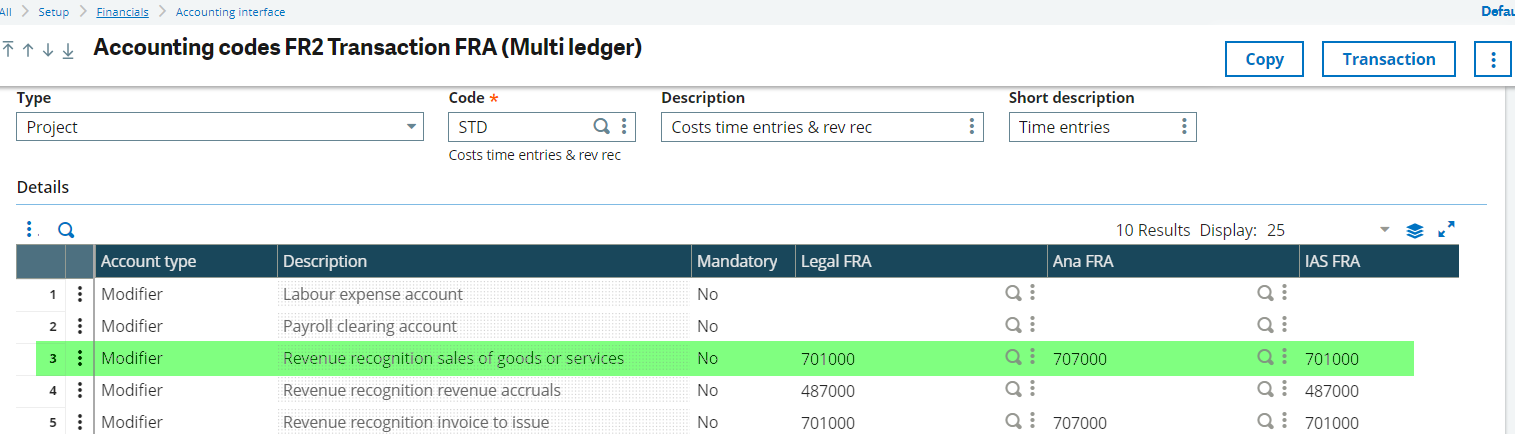
The same principle applies to the second line (credit account), and to expenses.
You still have the option to update the accounts manually if they belong to the correct chart of accounts for the company. A control prevents you from entering an incorrect account. The following warning message displays:
"Field error 'Credit account'
Accounts: 00471000
Record does not exit"
Verifying amounts and adjusting the revenue recognition record
Calculated amounts display in the Columns grid in the Calculated amount and Adjusted amount columns.
The Est. revenue at completion, Adjusted percentage, and Net recognized values can be manually adjusted for the business need. However, the amounts in the Calculated amount column are always retained for traceability.
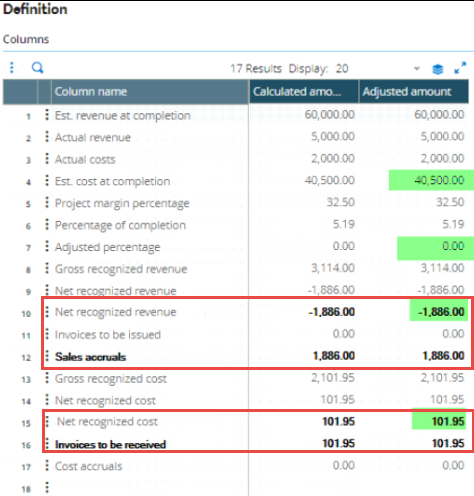
When an amount is changed, the amounts in subsequent columns are updated. If the sign of an amount changes, the appropriate column type populates dynamically.
If you are not sure about a calculated amount or percentage calculated, you can recall the formula description entered at the rule level to view the formula and better understand the result.
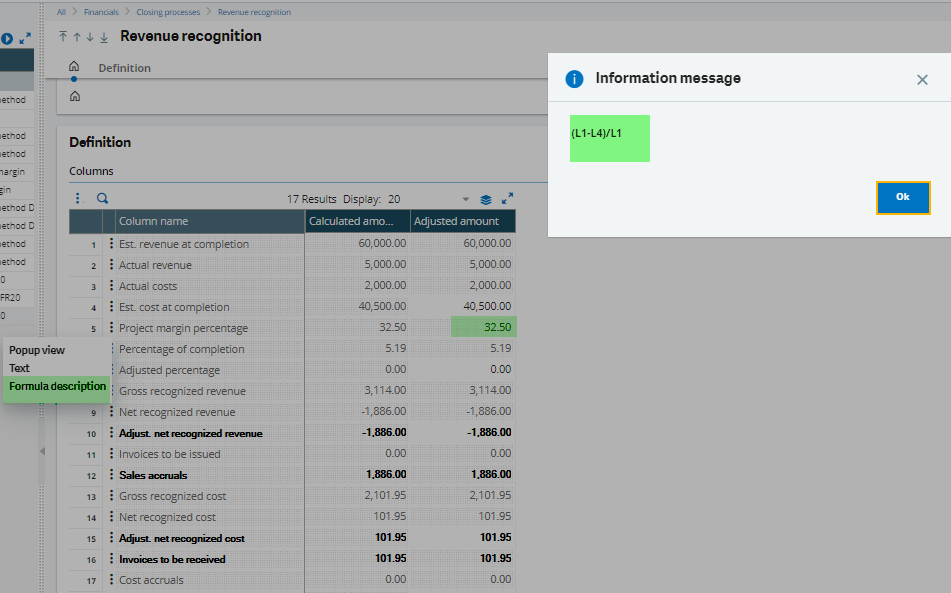
If the financial snapshot was generated more than 10 days from the current date, the Est. cost at completion is highlighted in yellow. If the financial snapshot was generated more than 20 days from the current date, it is highlighted in red.
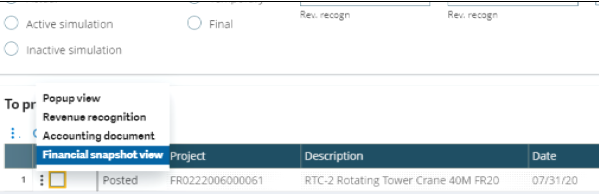
You can view the financial snapshot used in the calculation for further verification by selecting Financial snapshot view in the Actions panel.
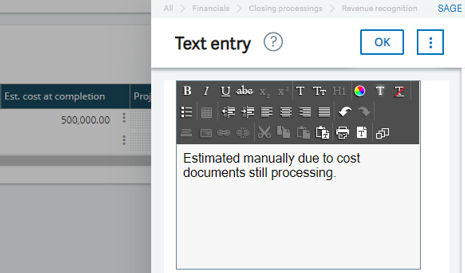
To facilitate inquiries after revenue recognition has been posted, you can enter a comment on a line for a specific amount or on the header for the entire record. You can also add an attachment.
To view the journal entries used to calculate the Actual revenue and Actual cost column types, select Journals on the appropriate line.
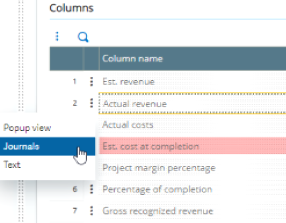
A new screen opens that displays information such as the account, company, accounting date, document number, ledger debit or ledger credit, and the project and entry statuses.
Validating amounts
After you have verified the amounts and made any adjustments needed, you can validate.
When you click Validate, you are warned that you can no longer modify or delete the record. Click OK to validate and prevent further modifications.
Depending on your company setup, you could have the option to Cancel validation from the Actions panel and return the record to an editable state.
If certain column types are not in the rule, like those that generate journal entries, you receive a warning message and are asked if you want to add the missing column type or proceed without generating a journal entry.
For example, if the Net recognized revenue and/or Net recognized cost column types are missing, you are prompted to add these or the journal entry will not be generated when posting. This also applies if the Sales accruals, Cost accruals and/or Invoices to be received column types are missing.
When you click OK, the entry is validated with the definition for the current rule.
When you click Cancel, the Entry status is Awaiting validation. You must update the rules including the journal triggering column entry types. In the Validation screen, you need to validate the records and ensure that no warning message displays.
Posting revenue recognition amounts
The final step is posting the record to create journal entries to debit and credit the defined accounts for Revenue posting and Expense posting. Generating a simulated post is not required, but is a good practice.
Posting in simulation mode
When you run a simulation, you can review journal entries and make adjustments before posting in actual mode.
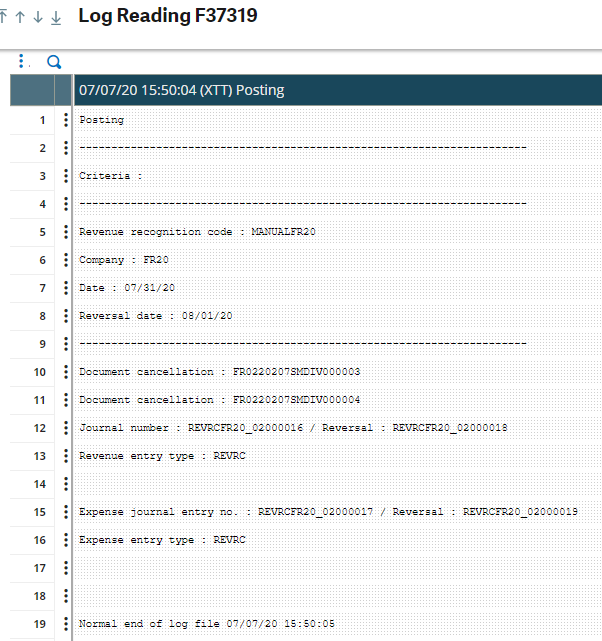
A log file displays after you post the record. If you have previously posted the record, the related entries are canceled when you re-post the record. The canceled entries display in the log file:
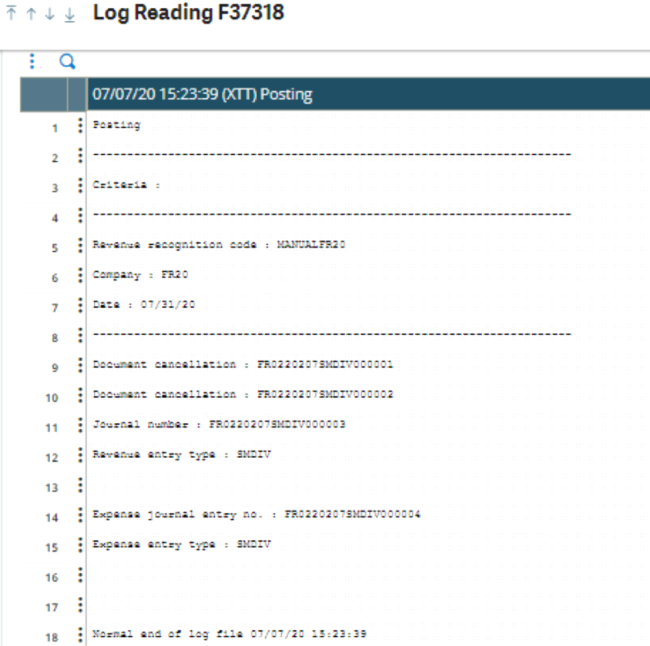
The journal numbers display in the Journal number field in the Revenue posting and Expense posting sections.
The record status updates to Posting simulation.
The Post action remains enabled, and a journal entry can still be regenerated until you post the record in actual mode.
You can also jump to the journal entry by selecting Journal entry in the Actions panel.
All related journal entries are listed:
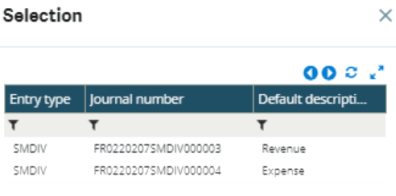
Select the a line to jump to that entry.
When you are satisfied with the results, you can change the Generation type to Actual and finish the process.
Posting in actual mode
When you post in actual mode, the revenue recognition is posted to the relevant journals.
A log file displays the canceled document information as well as the new journal number generated, and its reversal entry information. The reversal journal entry can only be generated in actual mode.
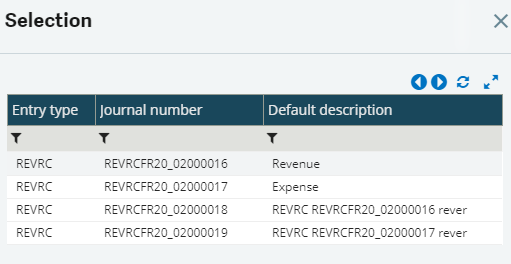
When you click Accounting document, all journal entries that were generated are listed including the reversal entry.
The status of the record is now Posted, and no more entries are allowed.
Processing multiple projects
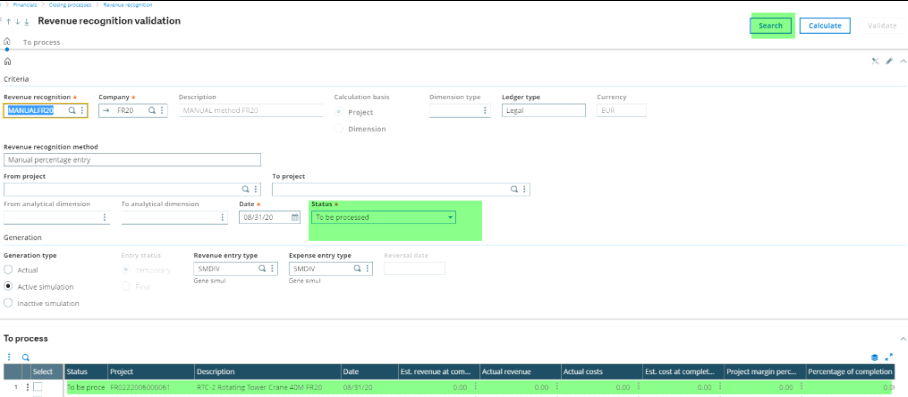
Open: Financials > Closing processes > Revenue recognition > Revenue recognition validation
You must use the Revenue recognition validation function (GESREVRECW) to process revenue recognition for multiple projects or analytical dimensions. The workflow is similar to processing a single project with the ability to calculate, validate, and post in a workbench format.
-
Select the Revenue recognition code and Company.
-
Select a range of projects or analytical dimensions in the related fields according to the rule. Only projects that have the selected revenue recognition code assigned are available.

-
Enter the date.
-
The Entry type field defaults to the Generation type and the related parameter value.
-
Click Search with the Status set to To be processed for records to be generated for any projects meeting the selected criteria.
-
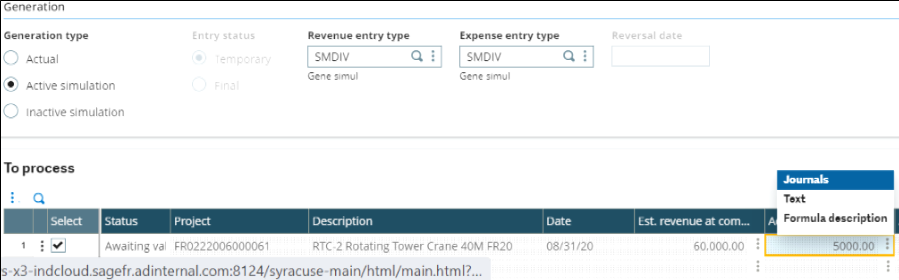
The To process grid includes the same lines in the Revenue recognition function.
-
Select the records you want to process and click Calculate to generate the amounts. Messages regarding the financial snapshot or temporary journal entries could also display depending on your settings as described previously.
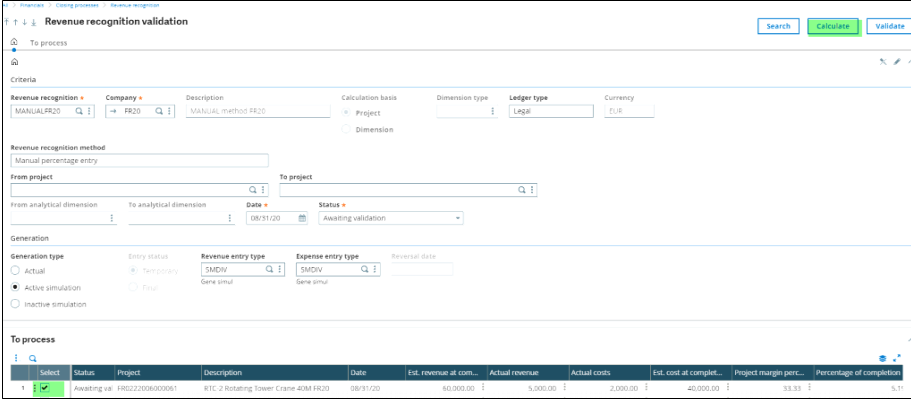
-
The amount(s) to be posted are displayed in bold as Net recognized revenue. Like the process for a single project or dimension, the following values can be manually adjusted to suit the business needs:
- Est. cost at completion
- Adjusted percentage
- Adjusted net
Similar verifications are available with the ability to view the Financial snapshot and the journal entries that are used to calculate, as well as formula description and text.
-
After you have verified the amounts and made any adjustments needed, continue the process of validating and posting. With each step, ensure that you select the correct records you want to process.
Deleting a revenue recognition record
You can delete a revenue recognition record from the Revenue recognition function if no journal entries have been generated for the record. You cannot delete a record from the Revenue recognition validation function.