Set up your handheld device

Type of handheld device, OS, and web browser

For detailed information about tested handheld devices, required OS versions, and recommended web browsers, refer to the Sage X3 Services installation documentation.

This document includes references to the Google Chrome™ web browser.

Sign in to Mobile Automation

  1. Select or scan the URL on first use and open the handheld page: https://loginUrl/handheld.

    To navigate to the handheld pages, refer to the Sage X3 Services installation documentation.

  2. Sign in to Sage Business Cloud and Sage X3.

    1. To sign in to Sage Business Cloud, enter your Sage ID for Sage X3.
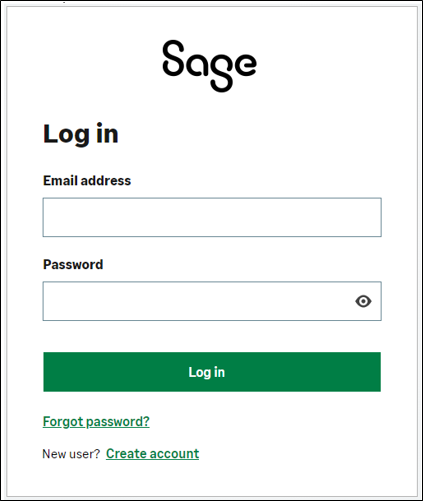
      The screen to sign in to Sage Business Cloud from your handheld device.

      Handheld device sign in screen for Sage Business Cloud.

    2. Sign in to Sage X3 .

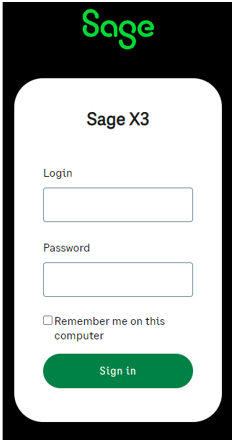
      The screen to sign in to Sage X3 from your handheld device.

      Handheld device sign in screen for Sage X3.

  3. Sage recommends you create an icon on your handheld home screen so that you can sign in to Sage Business Cloud easily the next time you want to use it.

Add a fast access icon

To add an icon on your handheld home screen so that you can sign in to Sage Business Cloud quickly and easily:

  1. Sign in to the Mobile Automation application (UI).
  2. With the focus on the initial or home page, next to the URL, tap the ellipses (Customize and control Google Chrome™.)
  3. Select Add to home screen.
  4. Tap Add.

    The icon displays on the device home screen.

The following error message displays when connecting the handheld device to the Mobile Automation application for the first time if the default endpoint folder is the parent Sage X3 folder (Syracuse folder) and not a subfolder (a functional folder):

Error displayed on the handheld device when connecting to the Mobile Automation application for the first time if the default endpoint folder is the parent folder instead of a subfolder.

Handheld device sign in error.

If this happens, you need to:

  1. Sign out of the Mobile Automation application.
  2. Sign in to Sage X3.
  3. Select the correct endpoint (functional folder).
  4. Sign in again to the handheld device.

    The endpoint selected in Sage X3 is used as the default endpoint folder for the Mobile Automation application.

Mobile Automation home page

Once you are connected to the Mobile Automation application a home page opens. It displays:

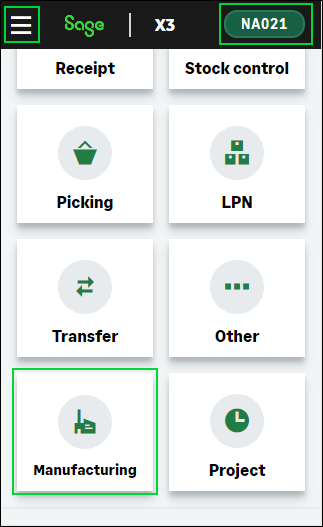
The initial navigation screen displayed when you open the Mobile Automation application. The area of the navigation panel mentioned in steps 1, 2, and 3 have a box surrounding them.

Mobile Automation application
navigation panel

  • A header with a menu and the site assigned to you.

    Tap the menu to access the Settings.

    Tap the menu to edit the Site.

  • The navigation panel.

    The Mobile Automation transactions are grouped by category from dedicated menus.

    The transactions detailed in this guide are displayed when you tap Manufacturing.

  • Tap a button to display and access the menus and transactions.

Mobile Automation Settings

You can display and edit the default settings defined for your current Mobile Automation session.

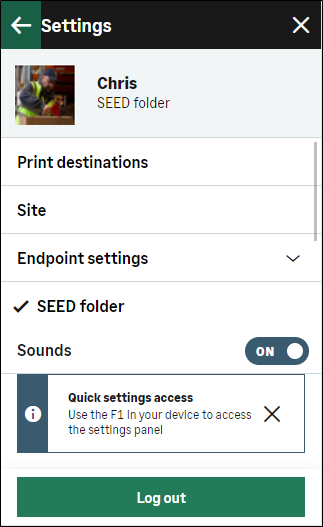
Tap the menu in the header to access the Settings panel. Your picture and name from the Sage X3 Users function (GESAUS) display. Your endpoint also displays.

You can use the F1 shortcut in your device to access the Settings panel.

The Settings panel which displays your name and your picture from Sage X3, and the links you can select to set up your handheld device.

Mobile Automation application Settings panel

In the Settings panel:

  1. Tap Print destinations.

    Select the printers for labels and documents:

    1. Search or start typing to see a list of Label destination printers.
    2. Tap the printer destination from the results.
    3. Search or start typing to see a list of Document destination printers.
    4. Tap the printer destination from the results.

    Tap Set destinations.

  2. Tap Site.

    The site assigned to you displays. Your default site is defined in the Sage X3 Function profile function (GESAFT) for the Manufacturing module. To change the site:

    1. Search or start typing to see a list of sites.
    2. To further filter the results, tap the Open filter icon.
    3. Switch ON the filters you want to use and enter the values.
    4. Tap Apply.
    5. Tap the Site from the filtered results.

    Tap Set site.

  3. Tap Endpoint settings.

    1. Select the Sage X3 folder to use for your Mobile Automation handheld session.
    2. Check the folder name displays with your picture and name.
  4. Switch Sounds to ON to hear sounds when using the Mobile Automation transactions.

    You will hear a sound when a success or an error message displays when you:

    • Scan data
    • Tap the Create or Submit action in the transactions.
    To stop the sound, cut the sound on your device.