Use the portal
Now that the web service has been published, you can access the application data in real-time via the portal.
Access the portal
Using the default browser that you set earlier, enter the URL of your web portal. In this example, the URL is http://x3pu9trainvm:8125/sagex3.
Click CONNECTION and log in with the username and password you chose when setting up the portal.
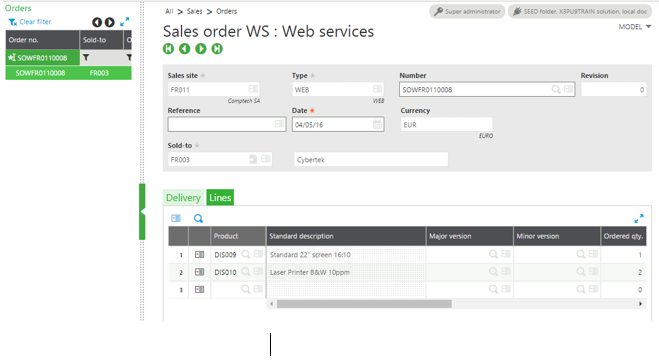
As a reminder, because this web service is based on YOSOH for sales information, this portal provides access to orders in Sage X3.
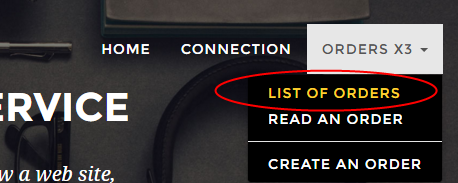
From the ORDERS X3 pull-down menu, select LIST OF ORDERS.
You can see the list of current orders in your application instance.
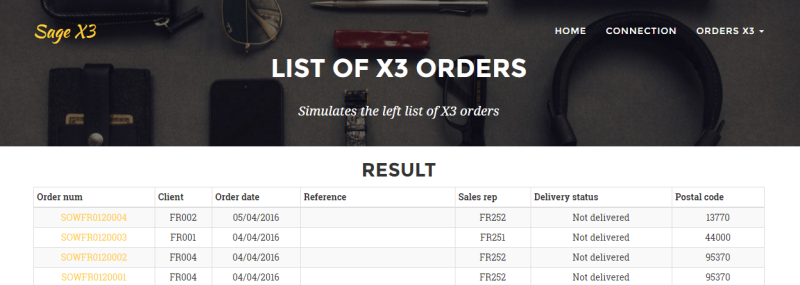
When you look at this data in Sage X3, you can see that it is the same.
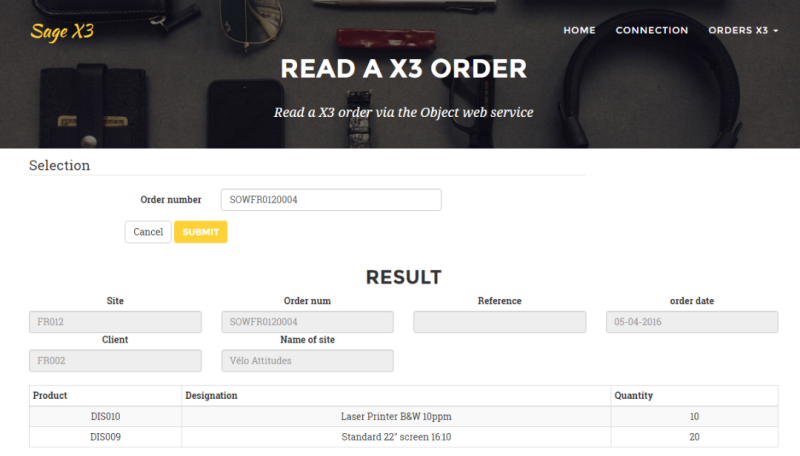
Read an order
You can read orders by selecting them from the list or by selecting READ AN ORDER from the ORDERS X3 menu and entering the order number. For either method, you do not need to be logged in to the portal.
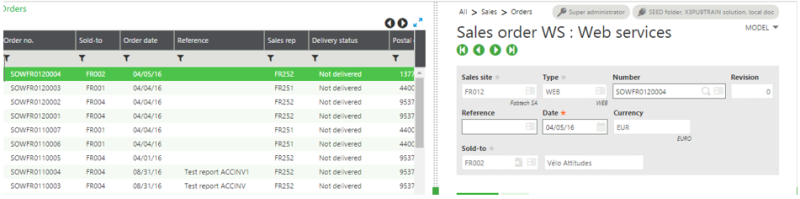
Click the order number for one of the orders in the list to see detailed order information. This example uses the SOWFR0120004 order.
Create an order
You can create an order in Sage X3 using the portal.
From the ORDERS X3 pull-down menu, select CREATE AN ORDER.
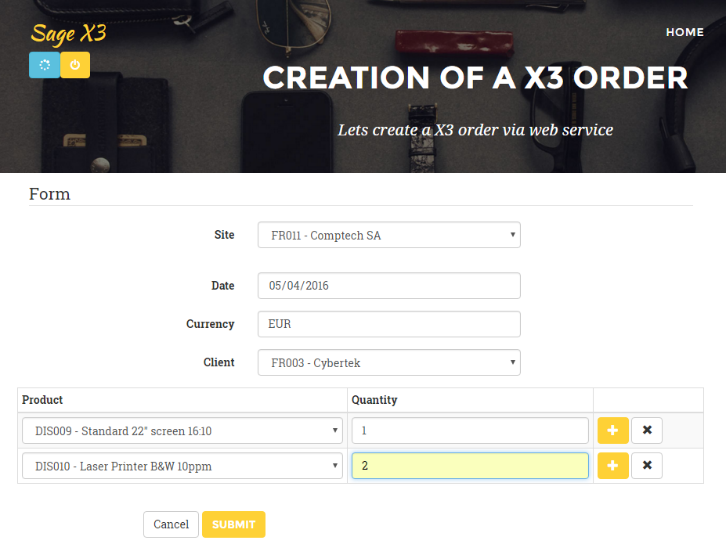
Enter the relevant information as if you were working directly Sage X3 and click Submit.
When the order is created, click the order number to view details.
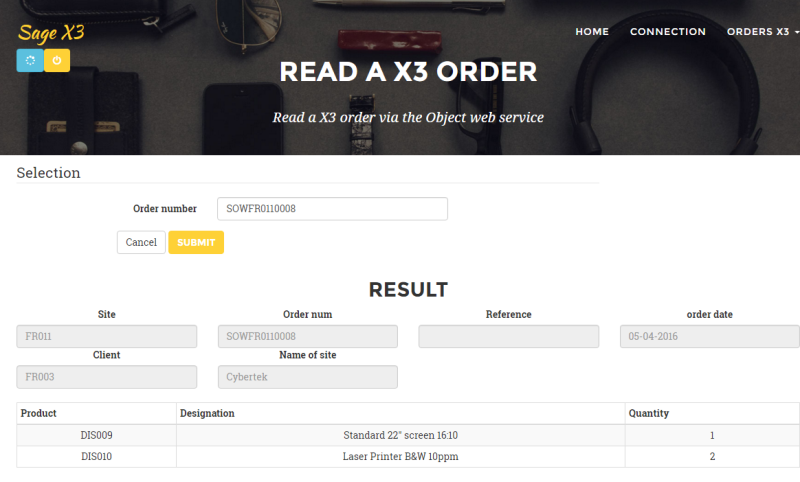
In the WS entry transaction in Sage X3, you can see the same order: