Navigation pages
| Administration Page | Application/Contract | Syracuse/Collaboration | Class | navigationPages | Representation | navigationPage |
|---|
A navigation page is a page that organizes the links to different menu items referring to Sage ERP pages. This function is dedicated to the setup of these pages.
Description of the navigation page
A navigation page is defined by the following information:
Page name
Identifies the page. A default "home" page is supplied.
Title
Defines the title that appears when the navigation page is displayed. This information is entered by default in the current language.
A translation link is present for this information:
![]()
It enables entering descriptions in different languages with the corresponding widget.
Modules
This section displays all the modules of the navigation page. A module corresponds to a menu entry at the first level of the hierarchy. Modules can be added by selection from a list of available modules, their label can be modified. You can delete a module from the page, and you can change its rank on the list by using the handle represented by three points on the left border of the field:

Roles
Is the panel of roles that uses the navigation page as a default page. When users connect to a role on their landing page, clicking the navigation page will display the page associated with the current role. If no association exists, the "home" navigation page will be used by default.
Factory
This check box defines if the record is supplied as a factory record. When this happens, a factory code is also displayed and can be entered if you are a factory provider. This features allows to prevent some modifications on records supplied by defaut by Sage or by a vertical solution provider. More information about this feature is given in the following document.
Edit page contents
This link allows you to edit the entire hierarchy of the navigation page, and not only the first level and the roles assignment. When this mode is selected, a page similar to the following appears:
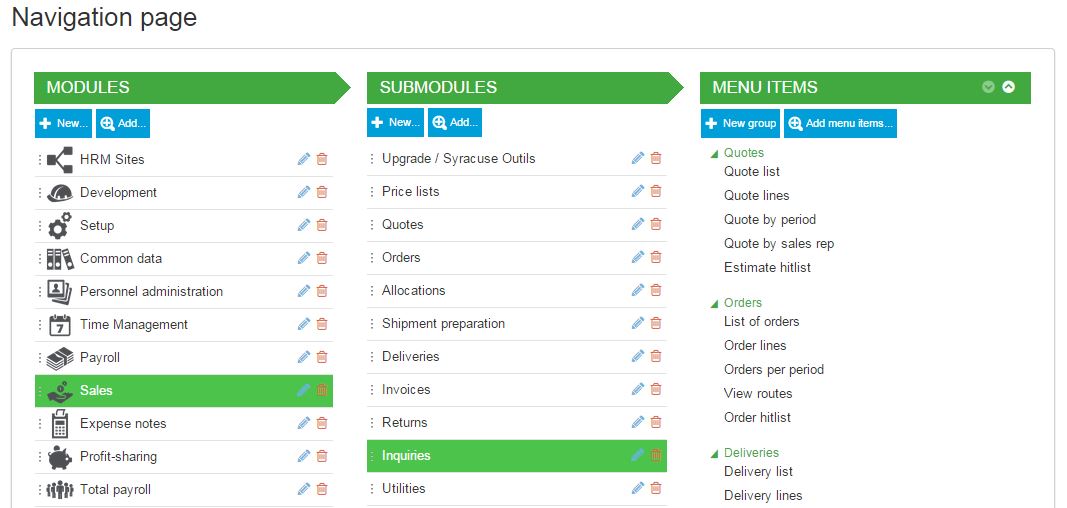
This page displays:
- On the first column, a list of modules. A module can be:
- Added as a new module.
- Selected from the existing module list.
- Moved to another position by clicking the three points that appears when the mouse hovers over the left border of the title, and then dropping it on its final position.
- Deleted by clicking the recycle bin icon.
- Selected by clicking it to display the second level of the hierarchy on the next column.
- On the second column, a list of sub-modules associated with the module selected. The same options exist to select, delete, move, and add elements.
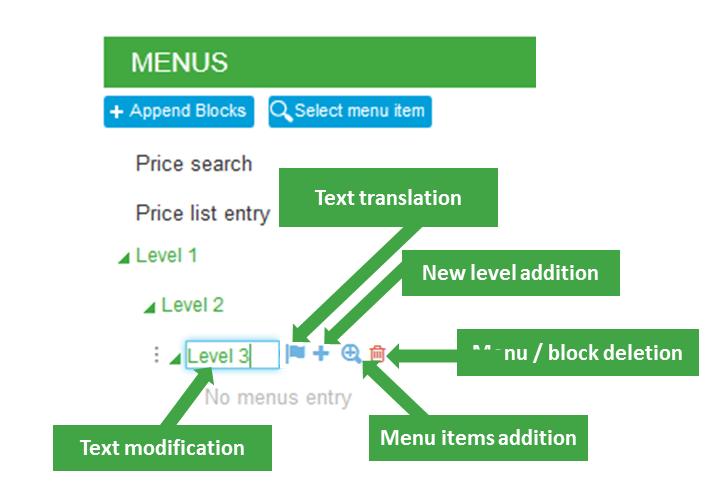
- On the last column, the menu items can be: added by selection, moved, and deleted. An additional option allows you to create blocks that include menu items or sub-blocks recursively, as shown on the following screen: