Getting started
Setting up Sage X3 endpoints
To execute these automated tests in Sage X3, the Enable Test Robot parameter needs to be activated on the endpoint where the tests will be executed. If you don’t have access to admin user credentials, ask your local admin to set it up for you.
Open: Administration > Endpoints > Endpoints
-
Log in with admin-level permissions and open the Endpoints function (endPoints).
-
Edit the endpoint where the automated test will be executed.
-
Make sure a Nature is defined for the endpoint.
-
Select the Enable Test Robot check box.
-

The Enable Test Robot check box is only available only for endpoints whose Nature is different from Production. You cannot run these tests on production environments.
The following error will be returned when you try to execute a test if the Enable Test Robot check box is not selected:
"Sage X3 Automated Test Platform license verification: Enable Test robot parameter not activated for the current endpoint."
Setting up Visual Studio Code
Setting up VSCode Icons
-
In the Windows search bar, enter Visual Studio Code.
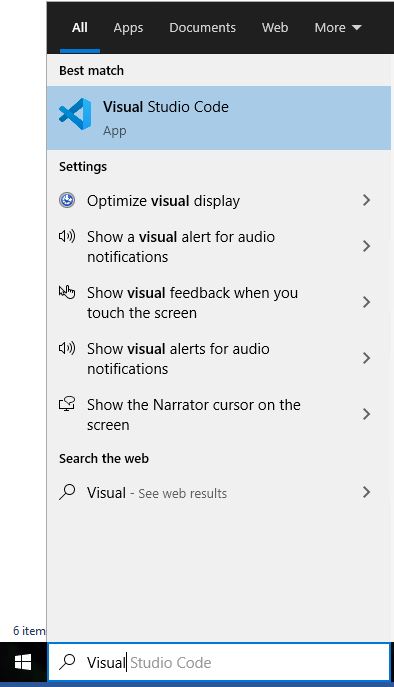
Visual Studio Code (VS Code) opens the project by default.
-
Click File > Open Folder and locate the folder where the project has been installed. For example: C:\Program files\ATP.
-
If you use a different location when completed the install, select the location you defined during the installation.
The project loads in VS Code.
-
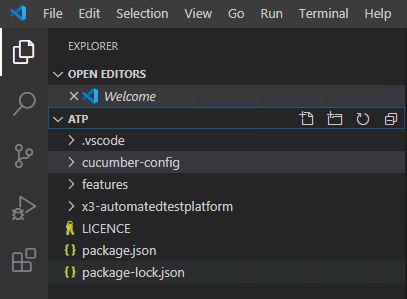
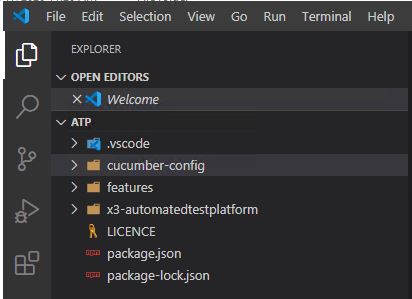
Click File > Preferences > File Icon Theme.
-
Select VSCode Icons.

The project now displays the files and folders icons.
Setting up your parameters
-
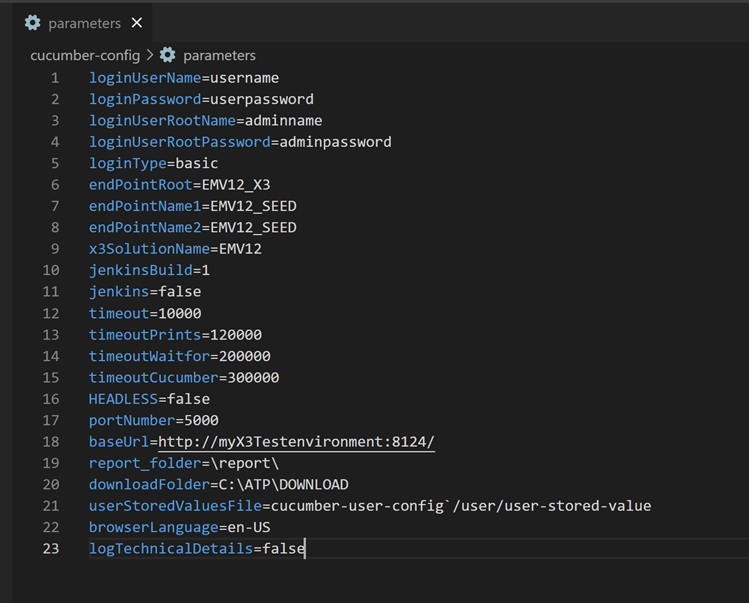
Open the cucumber-config folder and open the parameters file.
-
Set these static parameters to execute your feature files:
-
loginUserName: Enter the required X3 user to execute the automated tests on the applicative folder of your Sage X3 test environment. This parameter is mandatory.
-
loginPassword: Enter the required X3 user password to execute the automated tests on your Sage X3 test environment. This parameter is mandatory.
-
loginUserRootName: Enter the required X3 user to connect to the X3 root folder of your Sage X3 test environment.
This parameter is optional and only needs to be defined if you have automated tests requiring connection to the X3 root folder of your Sage X3 test environment.
-
loginUserRootPassword: Enter the required X3 user password to connect to the X3 root folder of your Sage X3 test environment.
This parameter is optional and only needs to be defined if you have automated tests requiring connection to the X3 root folder of your Sage X3 test environment.
-
loginType: Select one:
-
basic: This option uses a basic connection.
-
sageid: This option uses the loginUsername and email address used for the Sage ID account.
Note - informationExecute the automated tests with a dedicated account. By default, it is set with the ADMCA user account.
-
-
endpointRoot: Enter the endpoint description of the X3 root folder of your Sage X3 test environment.
This parameter is optional and only needs to be defined if you have automated tests requiring connection to the X3 root folder of your Sage X3 test environment.
-
endpointName1: Enter the primary endpoint description of your test folder where the automated tests will be executed.
This parameter is required. -
endpointName2: Enter a secondary endpoint description of your test folder where the automated texts will be executed.
This parameter is only required if your automated tests (feature file) uses a secondary endpoint. -
x3SolutionName: This parameter is used to define the X3 solution name.
This parameter is required if you use it in your automated tests (feature file). - timeout:
timeout parameter indicates how long the robot should wait before returning an error when the element could not be found, the state of the element is incorrect, or the actual value found is different from the expected one.
Parameter default value: 10000 ms.
timeout parameter must not been set with a value below 10000 ms.
timeout parameter can’t exceed timeoutCucumber parameter.
-
timeoutPrint:
-
timeoutPrint parameter indicates how long the robot can wait when the following step definition is executed: "the user waits for a report printout with message" and before returning an error message to the user.
-
Parameter default value: 120000 ms.
-
Default value when the parameter is not defined: 120000 ms.
-
timeoutPrint parameter can’t exceed timeoutCucumber parameter.
-
-
timeoutWaitfor:
-
timeoutWaitfor parameters indicates how long the robot can wait for Sage X3 or Sage X3 Warehousing feedbacks (e.g screen validation, page loading, open a function etc..) before returning a functional error message to the user.
-
Parameter default value: 200000 ms.
-
Default value when the parameter is not defined: 200000 ms.
-
timeoutWaitfor parameter can’t exceed timeoutCucumber parameter.
-
-
timeoutCucumber:
-
timeoutCucumber parameters indicates the maximum time the robot can wait before returning a timeout error message to the user.
-
Parameter default value: 300000 ms.
-
Default value when the parameter is not defined: 300000ms.
-
-
baseUrl: Enter the URL of the targeted Sage X3 test environment.
This parameter is required. -
portNumber: This parameter defines the internet port used to generate the Allure report; by default, the internet port 5000 is used.
If this internet port is not open on your local machine, you can enter a different internet port value. -
downloadFolder: Default path where the files and reports are generated by Sage X3.
-
userStoredValuesFile: Define the path of the user-stored-values file that will be loaded before each test is executed.
This parameter is optional.
To learn more about user stored values, refer to the Using user stored values chapter.
-
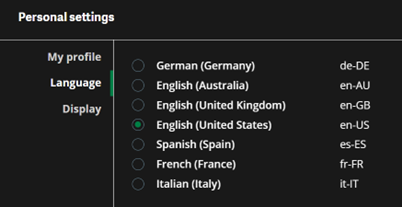
browserLanguage: Use this parameter to define the language of Chrome browser (to differentiate it from the step definition aimed at changing the language of Sage X3).
-
The response of the GraphQL query / mutation returned by SageX3 depends on the language of the Browser.
-
If you don't define this parameter, the browser will be displayed by default in language en-US.
-
The language codes are the same as in Sage X3 (Arabic language is not supported).
-
-
headless:
-
true: the test will be executed without displaying the browser.
-
false: the test will be executed with the browser displayed.
-
Not defined: the test will be executed without displaying the browser.
-
-
logTechnicalDetails:
-
true: all the technical information is displayed in the terminal while running the tests.
-
false: the technical information displayed in the terminal is limited while running the tests.
-
Setting up Allure pdf functionality
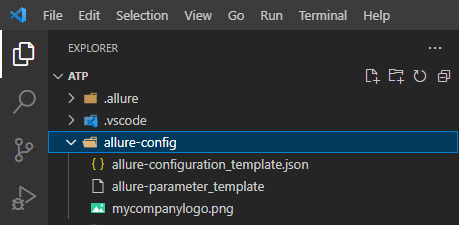
Open allure-config folder and modify the following files:
-
allure-configuration_template.json: it describes the layout of the allure report pdf file.
-
Duplicate the files as allure-configuration.json and do the necessary attributes modifications to adjust the layout of your pdf report.
-
LogoPath
-
Path of your company logo.
-
Accept both relative or exact path.
-
-
NewPagePerScenario
-
true: the split is done with one scenario per page.
-
false: the split is done by feature (multiple scenarios per page).
-
-
SortFeaturesByRunOrder
-
true: Features ordered by execution time.
-
false: Features ordered by alphabetical order.
-
-
DisplayTextAttachment
-
true: Allure attachments content are displayed in allure pdf file
-
false: only the title of the allure attachment is displayed in the allure pdf file.
-
-
TextFormat
-
The font accepted are Helvetica.
-
TitleFont: font type for the report title.
-
TitleSize: font size for the report title.
-
TitleFormatOptions: additional font characteristics for the report title.
-
HeadingFont: font type for the report headings (e.g. Environment parameters, Tests summary).
-
HeadingSize: font size for the report headings.
-
HeadingFormatOptions: additional font characteristics for the report headings.
-
EntryFont: font type for the entries (parameters list, features list etc).
-
EntrySize: font size for the entries.
-
EntryFormatOptions: additional fonts characteristics for the entries.
-
FeatureFont: font type for the feature name.
-
FeatureSize : font size for the feature name.
-
FeatureFormatOptions : additional font characteristics for the feature name.
-
ScenarioFont: font type for the scenario name and related timing information.
-
ScenarioSize: font size for the scenario name and related timing information.
-
ScenarioFormatOptions: additional font characteristics for the scenario name and related timing information.
-
ScenarioParametersFont: font type for the scenario information (e.g. browser, feature name).
-
ScenarioParametersSize: font size for the scenario information.
-
ScenarioParametersFormatOptions : additional font characteristics for the scenario information.
-
StepFont: font type for the step definitions.
-
StepSize: font size for the step definitions.
-
StepFormatOptions: additional font characteristics for the step definitions.
-
ErrorFont: font type for the error messages.
-
ErrorSize: font size for the error messages.
-
ErrorFormatOptions: additional font characteristics for the error messages.
-
TextAttachmentFont: font for allure attachment
-
TextAttachmentSize: font size for allure attachment
-
TextAttachmentFormatOptions: additional font characteristics for allure attachment
-
-
-
-
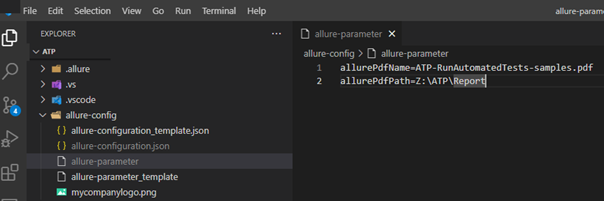
allure-parameter
-
parameter allurePdfName: Enter the name of the allure report pdf.
-
Parameter allurePdfPath:
-
Enter the path where the allure report pdf will be generated.
-
If you need to generate it in the repository, just add the name of the folder (e.g allure-pdf).
-
If you need to generate it on your local machine, add the required path (e.g c:\allure-pdf).
-
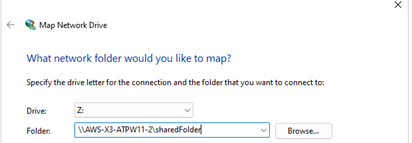
If you need to generate it into a shared folder, the shared folder needs to be mapped first in windows.
-
-
-
allure-parameter_template:
-
this template file contains the same parameters as allure-parameter file, for demo purpose.
-
-
Mycompanylogo.png : Sage logo.
-
Copy your company logo in allure-config folder.
-
Change the value of LogoPath attribute in allure-configuration.json file to replace it with your company logo.
-
Setting up VS Code terminal to use PowerShell (optional)
The following steps are only necessary if you don't use PowerShell terminal by default.
PowerShell terminal is defined by default when you install Sage X3 Automated Test Platform for the first time.
-
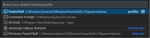
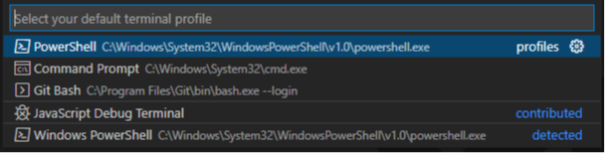
In the VS Code terminal, select Terminal, then Select Default Profile.
In case Select Default Profile is not accessible from this menu, it is possible to access it after pressing CTRL + SHIFT + P.

-
Select PowerShell.
-
Close all terminals in Visual Studio Code.
-
Press Ctrl+Shift+P.
-
Type reload and select Reload window.

-
The terminal is configured to use PowerShell.

-
If Git Bash terminal is still opened by default:
-
Close all terminals in Visual Studio Code.
-
Close Visual Studio Code.
-
Reopen Visual Studio Code.
-


Opening your project in VS Code
Normally, when you open VS Code, this opens the project.
If the project is not already loaded, select File > Open Folder and locate the folder where the project has been installed.
If you followed the instructions given in the Sage X3 Automated Test Platform - Client installer guide, you will find the project in the following directory:
For example: C:\Program Files\ATP\ (by default)
Now you should see the project loaded.
Setting up your workspace
There are two options for setting up your workspace depending on whether or not you have opted to use GitHub.
Option 1: Initiating your project without using GitHub
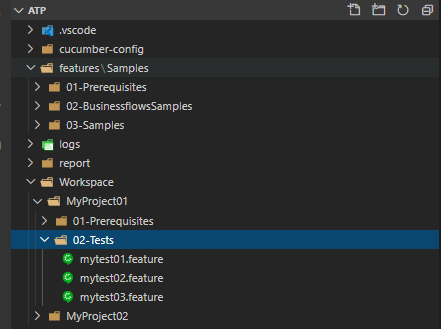
The directory features and its subfolders contain the standard samples and business flow samples. Do not create your automated tests inside these folders.
Those folders are erased and recreated at each update.
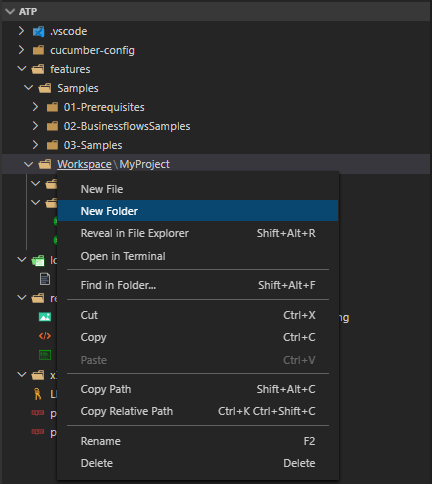
Use the Workspace folder to create your own automated tests.
-
Within the Workspace folder, create the necessary subfolders where you will create your own automated tests.
Option 2: Initiating your project and uploading it to GitHub
Prerequisites
-
Git must be installed on your local machine.
-
You must have a GitHub account and a GitHub repository.
-
For the following steps, the PowerShell terminal was used. See Setting up VS Code terminal to use PowerShell (optional) if you want to change your default shell.
-
Open VS Code and create the necessary directories as explained in Option 1: Initiating your project without using GitHub.
-
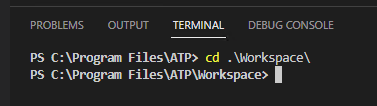
In the terminal, move into the root folder containing your automated tests.
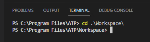
It is important to only save your automated files in GitHub.
You don’t need to save all the ATP configuration and binary files in GitHub.
Remember, GitHub only stores files.
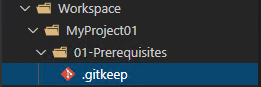
If you want to push an empty directory to GitHub, you need to have an existing .gitkeep file in the directory.
-
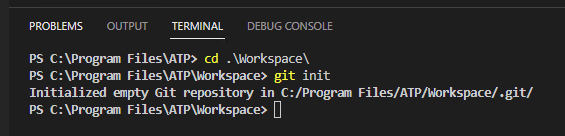
Type the command git init and press the Enter key.
-
Stage the files.
Staging is the process of preparing to send the project files to GitHub.
This adds the git project files contained in the Workspace directory and subdirectories into the staging area, where they will be sent, or committed, to GitHub.
Type the command git add . and press the Enter key. This adds all the files contained in Workspace directory and the subdirectories into the git project.

-
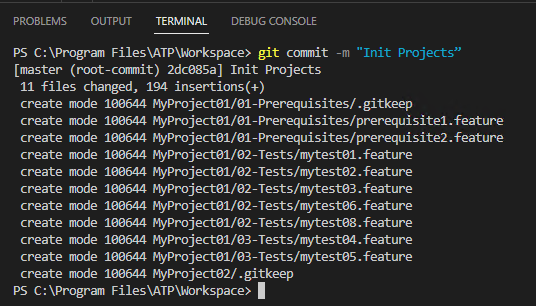
Commit the files to validate.
This is the process of adding the files that were staged to your feature branch so they can be pushed into GitHub.
Type the command git commit -m “your commit message” and press the Enter key.
Uploading the project to GitHub
-
To add your project to your GitHub repository, make sure you have a GitHub account and GitHub repository.
-
These operations must only be done when a new project needs to be added to GitHub. If your project already exists, see Option 3: Initiating your project by cloning your GitHub repository.
-
In the VS Code terminal, make sure you are in the directory where the git project has been initialized, (e.g., Initiating the project).
-
Enter the git remote add origin https://[username]:[accesstoken]@github.com/username/repository.git command and then press the Enter key.
For more information on access token creation, consult GitHub's documentation.


-
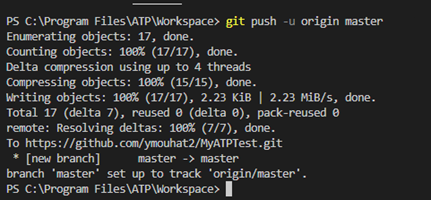
Push the project to GitHub.
This is the process of sending the files that were committed to GitHub. You are pushing the files from your local repository to the GitHub remote repository.
Enter the following command git push -u origin master and press the Enter key.
Your project is now added to your GitHub repository.
If you log in to GitHub, you should see your project files in your GitHub repository.

Option 3: Initiating your project by cloning your GitHub repository
Prerequisites
-
Git must be installed on your local machine.
-
You must have a GitHub account and a GitHub repository.
-
For the following steps, the PowerShell terminal was used. See Setting up VS Code terminal to use PowerShell (optional) if you want to change your default shell.
If you already have a project started and pushed to your GitHub repository, you can clone the project to your local machine.
-
In the VS Code terminal, make sure you are in the directory where you want to manage your automated tests.

-
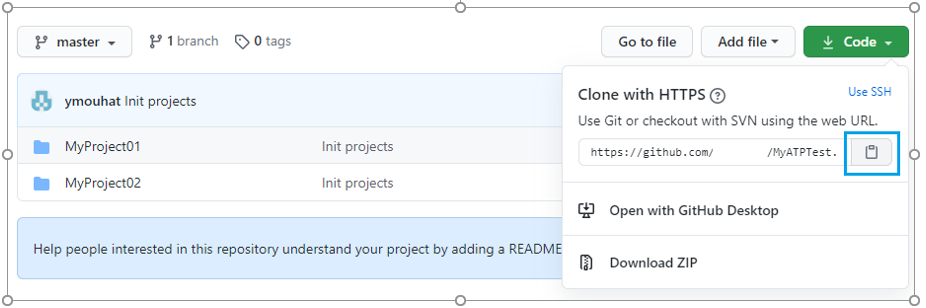
Get your repository URL.
In your repository, click Code, then click the Clipboard to copy the repository URL.
-
In VS Code, clone the repository.
Enter the git clone https://[username]:[accesstoken]@github.com/username/repository.git command and then press the Enter key.
For more information on access token creation, consult GitHub's documentation.
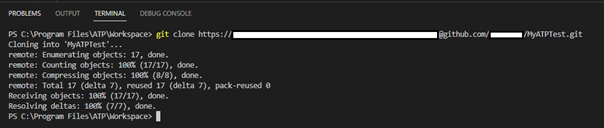
Your repository's files and directories have been added to the project.

-
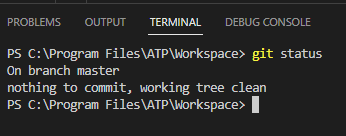
Confirm that the GitHub repository has been properly cloned on your local machine.
Enter the command git status and press the Enter key.
