Pushing and merging automated tests into master branch
When your automated tests are done and have been executed without any errors, follow the below steps to push your automated test files into GitHub.
Prerequisites
-
Git must be installed on your local machine.
-
You must have a GitHub account and a GitHub repository.
-
For the following steps the PowerShell terminal was used. See Setting up VS Code terminal to use PowerShell (optional) if you want to change your default shell.
-
Your GitHub project has been initialized using one of the methods below:
Option 2: Initiating your project and uploading it in GitHub
Option 3: Initiating your project by cloning your GitHub repository
Pushing your automated test
First, you need to update your feature branch with master to ensure there are no conflicts.
-
Enter the git pull origin master command and then press Enter.
If your feature branch is not up to date with master, any updates are added (merged) into your feature branch.
-
When new automated tests are created and git management is activated, the new files are marked as "untracked."
-
Click the Source Control icon in the left panel.
-
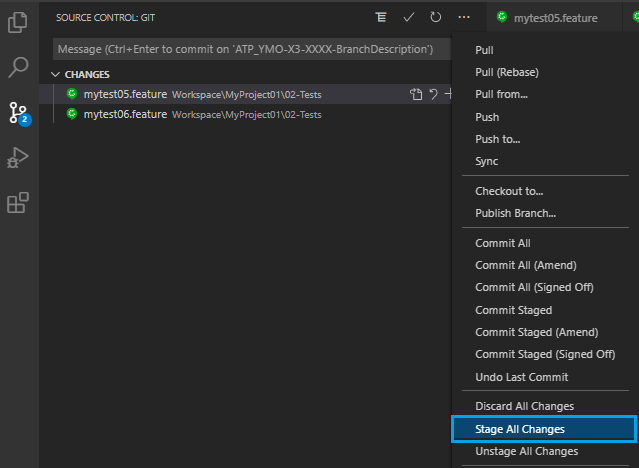
Stage the modifications you want to commit and push in GitHub.
Click the Plus sign to stage each automated tests.

Or click … and select Stage All changes.
-
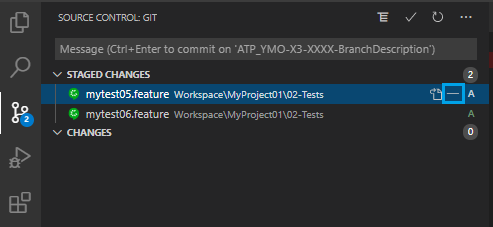
After the tests are staged, they display under Staged Changes.
Click the Minus sign to unstage a test or click … and select Unstage All Changes to cancel all the modifications.
-
Commit your changes.
Enter your commit message and click the Check mark to commit your changes.
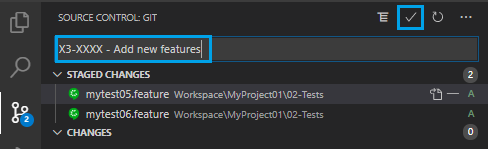
When the files are committed, the Staged Changes swimlane is empty, and you see that there is something pending to be pushed to the server in the bottom left corner.

-
Push your changes to your repository on GitHub.
Click … and then click Push.
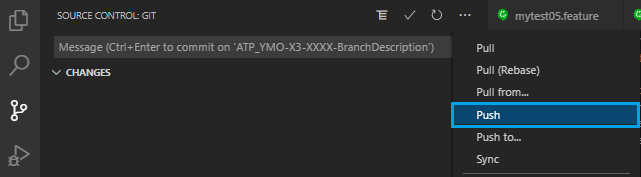
Confirm you want to push the feature branch.
-
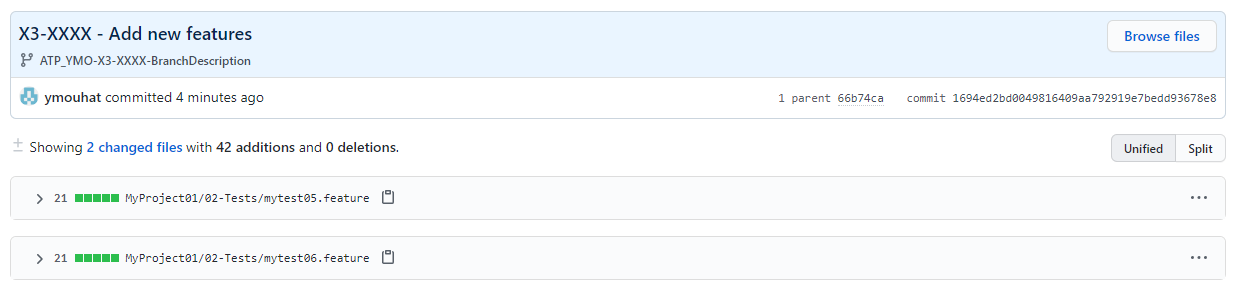
If you go to GitHub, you can see your changes.
Creating a pull request
Now that your feature branch is up to date with master, you can create a pull request process to merge your automation test feature branch into master.
Recommendations
You should always work in a feature branch and not directly commit and push your feature branch into the master branch.
It is recommended to protect the master branch by creating a pull request.
When you create a pull request, GitHub checks to make sure there are no conflicts. Depending your organization's workflow, the pull request is reviewed by someone before the feature branch is actually merged with master.
You can refer to the GitHub help page Enabling required reviews for pull requests to configure your branch policy and activate pull requests on the master branch.
-
Make sure your modifications in your feature branch have been committed and pushed and that your branch is up to date with master.
-
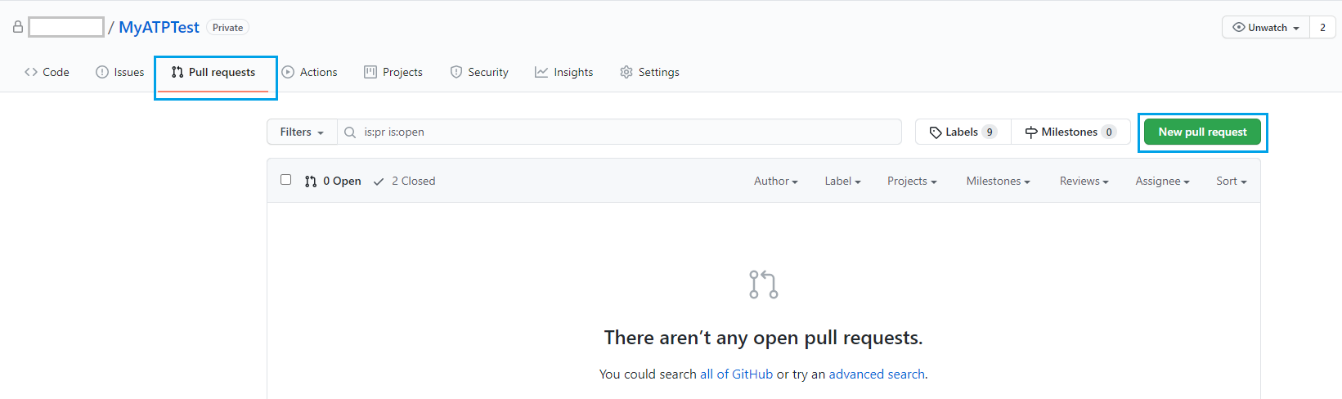
Connect to your GitHub repository and select your feature branch.
-
Click the Pull request tab and then click New pull request.
-
Make sure that you have selected base: master and select your feature branch to compare to master.
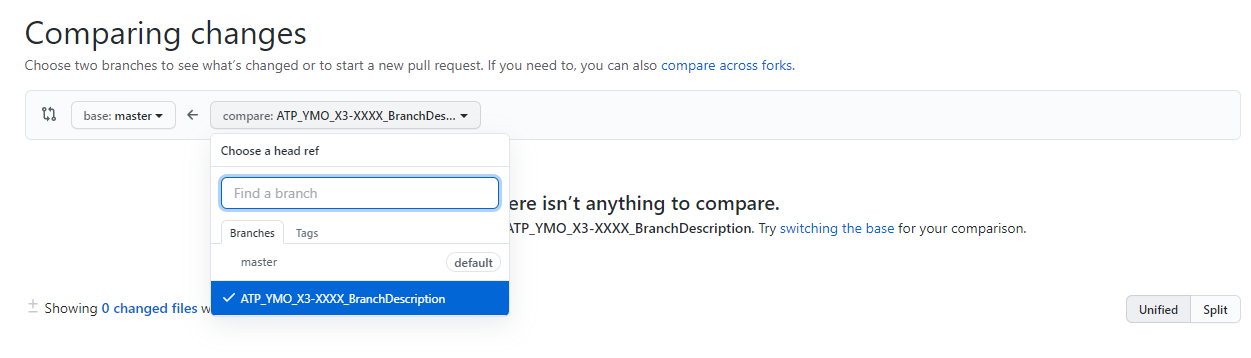
-
Click Create pull request.

-
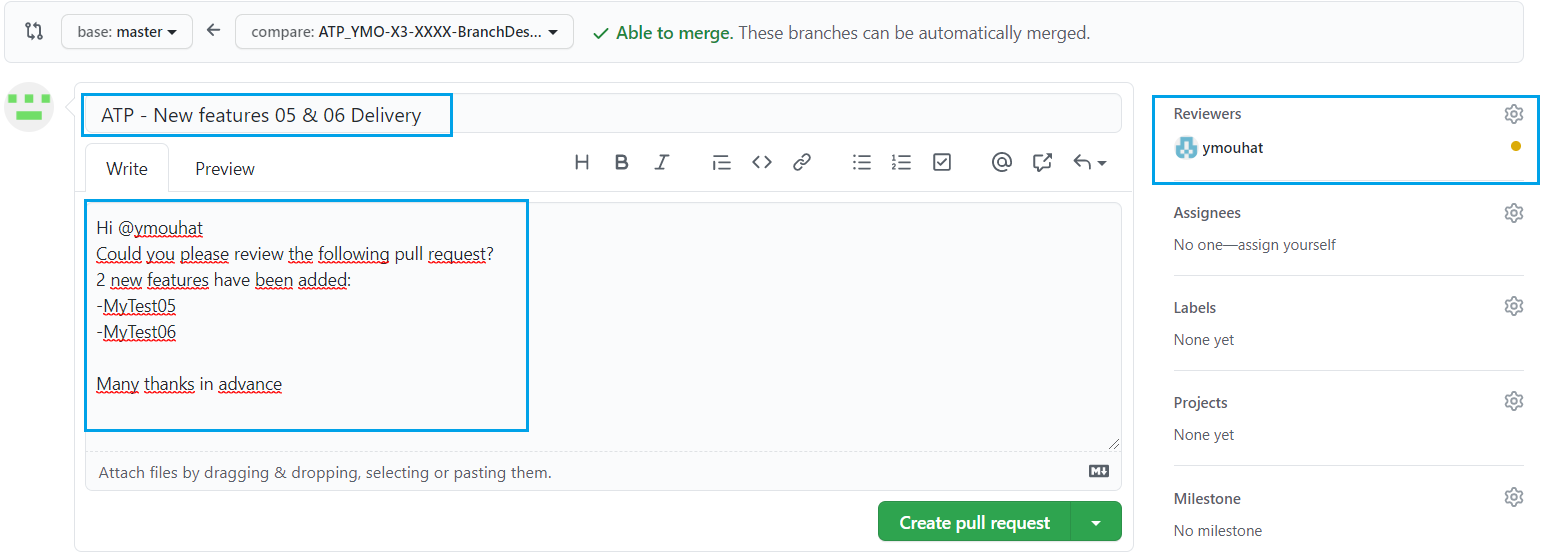
Add the required information:
-
Write a description for the request.
-
Explain what is in the feature branch to be merged.
-
Enter a reviewer.
-
Click Create pull request.
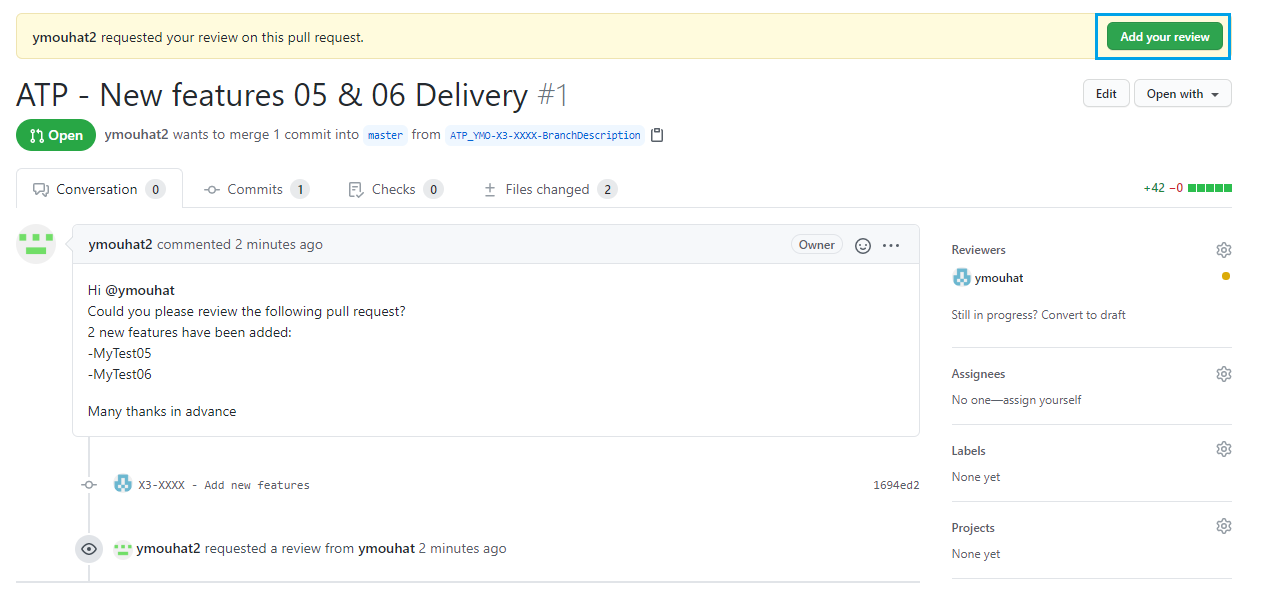
The pull request is added to the list of pull requests to be reviewed and merged.

-
The reviewer receives an email asking to review the pull request.
-
The reviewer opens the pull request and clicks Add your review.
-
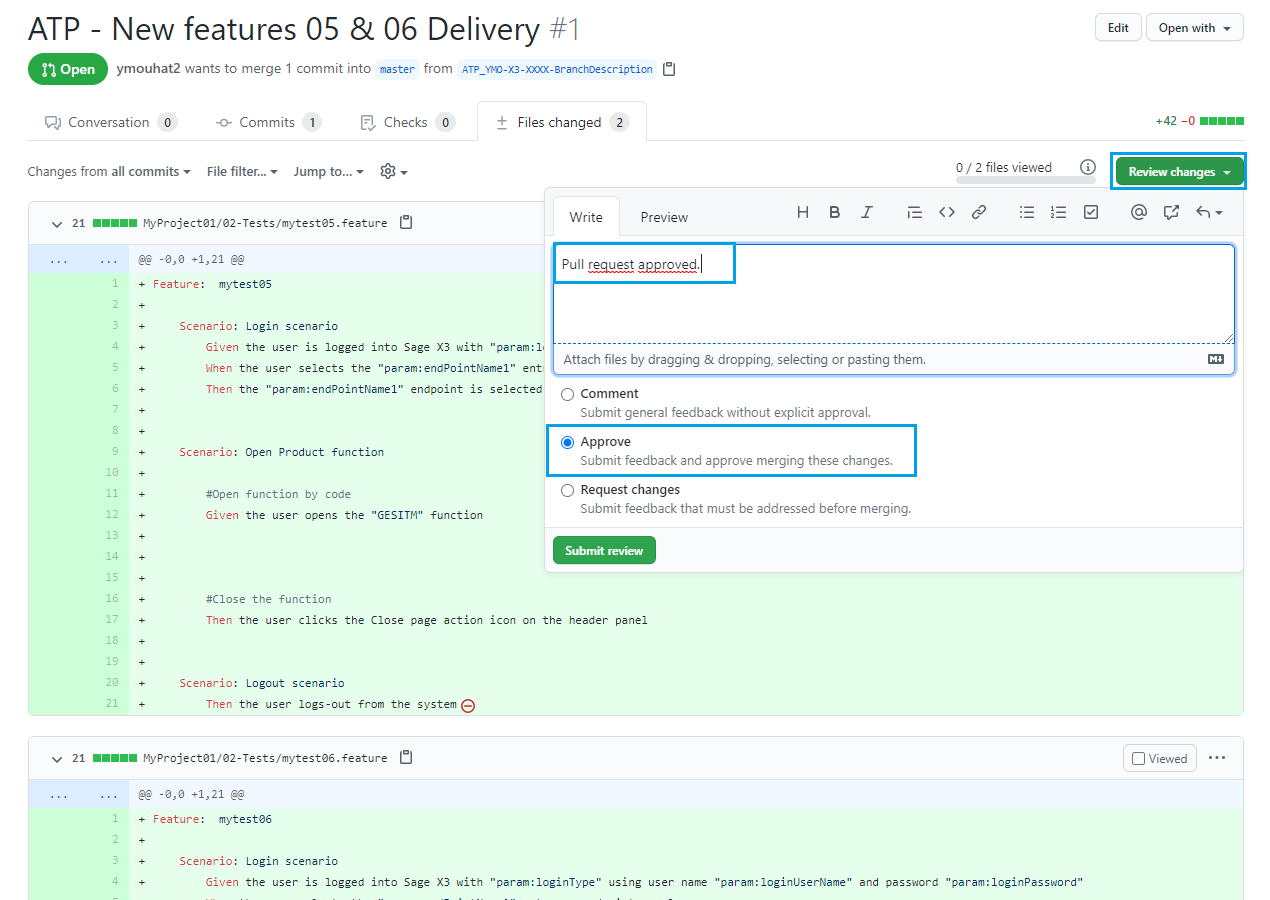
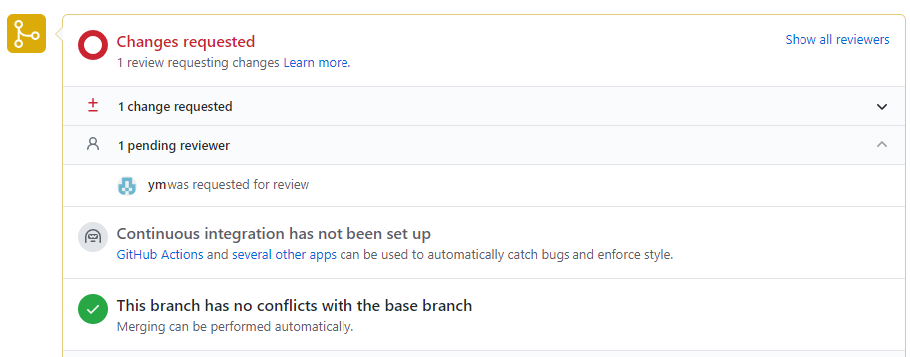
The reviewer can review the modifications, by clicking on Review changes. The reviewer has three options:
Comment - Submit general feedback without explicit approval.
Approve - Submit feedback and approve merging these changes.
Request changes - Submit feedback that must be addressed before merging. The pull request is closed and you will need to submit a new pull request.
-
Next the reviewer clicks Submit review.
-
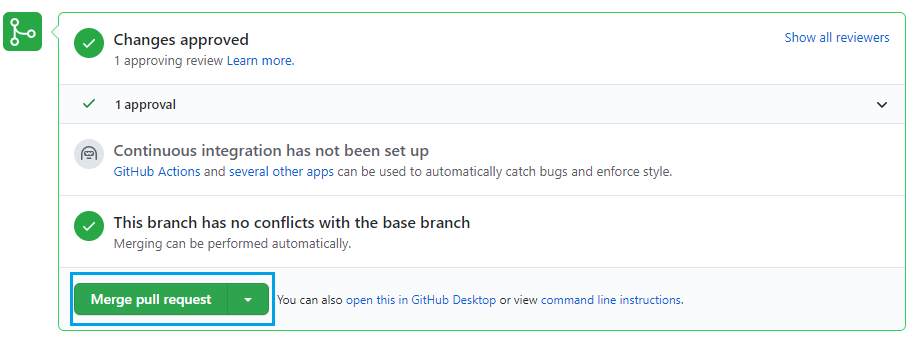
If the pull request is approved, the reviewer can merge your feature branch into the master branch by clicking Merge pull request.
If not approved, you need to address the changes and re-request a pull request.
-
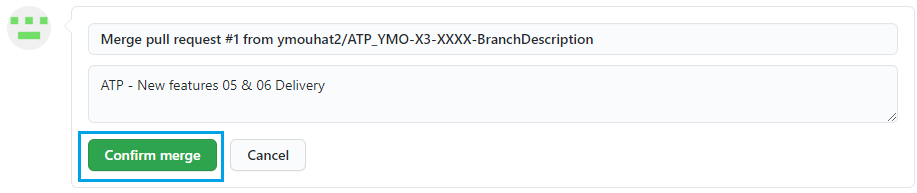
The reviewer clicks Confirm merge.
-
The pull request is closed.

Creating a re-request for a pull request
Sometimes your initial pull request is not approved and the reviewer asks for modifications. In this case you don’t need to reopen a pull request. You can re-request your pull request.
-
In VS Code, make sure you are on your feature branch.
-
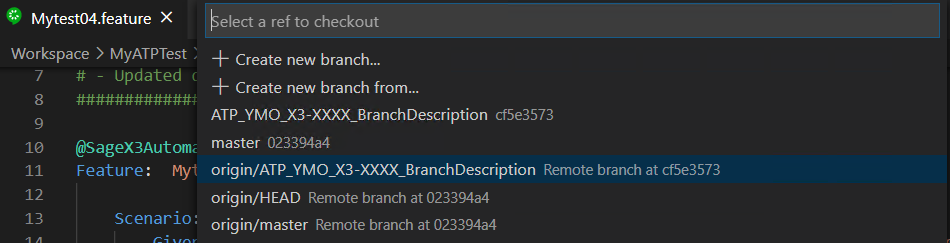
Click in the left bottom corner on the current branch.
-
Select your feature branch.
-
In the VS Code terminal, enter the command git checkout <Branch_Name> and then press Enter.
-
Make the changes requested by the reviewer.
-
Stage, commit and push your modifications.
-
Connect to GitHub and go to the initial pull request and select Re-Request review.

-
The reviewer must review again.
-
The process continues as explained above.
Deleting your feature branch after a pull request
To keep the remote repository clean, you can delete your feature branch after the pull request has been approved and merged into master.
-
In GitHub, Delete branch. The feature branch is then deleted from the remote repository.

Recommendations
The person who created the feature branch should be the one to delete it. This person knows if or when the branch can be deleted. This follows the principle of not modifying someone else's data.
After a branch has been merged by pull request into master, you should delete it and create a new branch from master for the next modifications or tests.
-
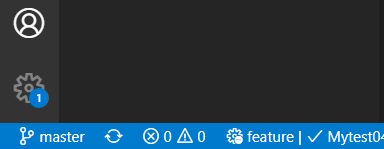
In VS Code, switch to the master branch and pull as described above.
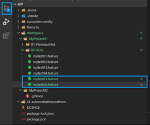
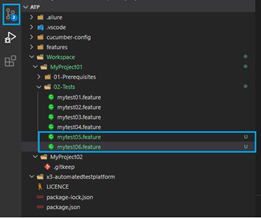
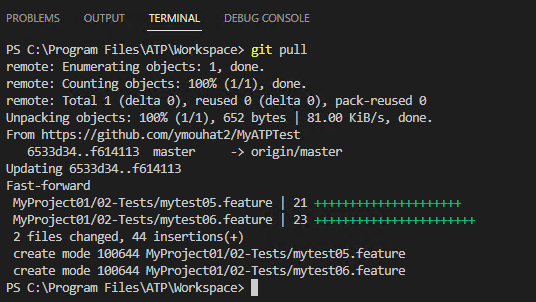
Check that your modifications are listed within the list of elements integrated to the master branch.
For example, the screenshot below shows the new automated tests Mytest05 and Mytest06 have been merged in master branch and added on your local master branch.
-
In the VS Code terminal enter the git branch -D <Branch_Name> command and press Enter.

If you have not deleted your feature branch from GitHub, you can also do it in the VS Code terminal using the git push origin --delete <Branch_Name> command.
