Sage X3 Services configuration
Overview
You need to install Sage X3 Services to use Mobile Automation (ADC) for distribution and Mobile Automation (ADC) for manufacturing.
There are two main steps to set up and check the server environment for Sage X3 Services:
- Install Sage X3 Services
- Configure the database connection in the Syracuse server
Important: Use a PowerShell prompt with administrator privilege for all the commands below.
Prerequisites
The Sage X3 Services component requires at least Sage X3 2021 R2 (V12) installation using a Microsoft® SQL Server
or an Oracle database.
You must install it on a Windows Server 2019 or 2022 operating system.
The Sage X3 Services component is not available on Linux.
'hostname':'port' combinations used by client devices to reach the application must also be reachable by the X3 Services server and correctly defined in Syracuse.
You need to have one of the following badges associated with your user:
- ADCDIS for distribution
- ADCMAN for manufacturing
- ADCALL for both distribution and manufacturing
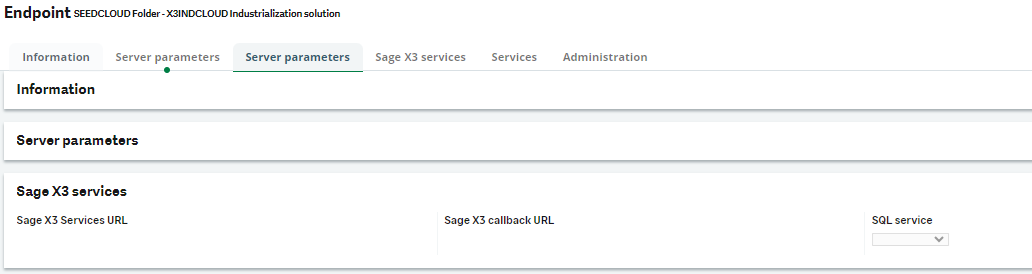
Configure the X3 solution and multi-endpoints
You need to configure the X3 solution in the Syracuse administration pages for the Sage X3 Services connection to work with your Sage X3 application.
Depending on the Sage X3 application database type, you need to configure an SQL Server service or an Oracle service.
Configure your X3 solution to define the Sage X3 Services URL and the X3 database connection:
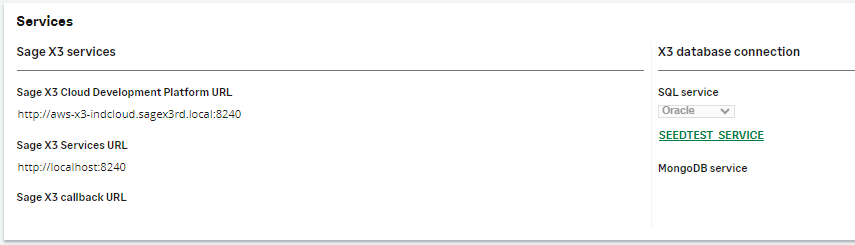
Optionally, you can define the Sage X3 Callback URL with an internal host URL. This can be done when the public URL can't be used internally or to facilitate the communication between X3 Services and the X3 web server.
By default, the public host will be used. Alternately, you can configure a different Sage X3 Services URLs per endpoint:
If you don't set any value to an endpoint, the URLs defined for the X3 solution will be used.
Configure an MS SQL Server service
Go to All > Administration > Administration > Endpoints > SQL Server service and edit the following fields:
| Field | Description | Example |
|---|---|---|
| Description | Description of your service that identifies it uniquely | SEED MSSQL service |
| Instance name | Database server host name or IP, followed by the port number where the database server is hosted, if it exists, and/or by the instance name, if any.
|
localhost |
| Database name | Name of the database used by the endpoint | sagex3 |
| User | Name of the user to connect to the folder | SEED |
| Password | Password for the database folder | Str0ng-seed-pwd |
| Connection encryption | Signals if the connection between X3 Services and the SQL Server is encrypted. | |
| Trust server certificate | Signals if a trust server certificates exists for the connection between X3 Services and the SQL Server. |
-
To achieve a fully safe connection between X3 Services and the SQL Server, Connection encryption and Trust server certificate should both be selected during the configuration of an SQL Server service. For further information, consult the SQL Server Configuration documentation.

Configure the outgoing requests
When a client sends a request to a server, the client receives its certificate during the handshake. This certificate is either issued by a well-known Certificate Authority or by a self-signed authority in the case of internal usage.
Node.js trusts the well-known Certificate Authorities curated by Mozilla at the time the binary has been built. If the certificate is not issued by one of these well-known Certificate Authorities or if it is self-signed, the request will fail unless if you explicitly trust it. To do so, you need to edit the xtrem-security.yml file as follows:
        loginUrl: https://login.dev-sagextrem.com/
        redirectUrl: https://cluster-a.dev-sagextrem.com/home
        jwksUrl: https://login.dev-sagextrem.com/.well-known/jwks.json
        issuer: login.dev-sagextrem.com
        audience: cluster-a.dev-sagextrem.com

        tls:
            extraCaFiles:
                - '/path/to/first/ssl/caCert.pem'
                - '/path/to/second/ssl/caCert.pem'
extraCaFiles is an array of paths to the trusted Certificate Authority to add.
Configure an Oracle service
Go to All > Administration > Administration > Endpoints > Oracle service and edit the following fields:
| Field | Description | Example |
|---|---|---|
| Description | Description of your service that identifies it uniquely | SEED Oracle service |
| Host | Database server host name or IP | localhost |
| Port | Database server port | 1521 |
| SID | Oracle SID | SAGEX3 |
| User | Name of the user to connect to the folder | SEED |
| Password | Password for the database folder | Str0ng-seed-pwd |
Update the X3 solution instance
Once you have created the appropriate SQL server or Oracle service, edit the X3 solution to fill in the following fields:
| Field | Description | Example |
|---|---|---|
| Sage X3 Services URL | URL of the Sage X3 Services installed in the previous steps | http://localhost:8240 |
| SQL service | Select the SQL server or Oracle service created in the previous step | SEED mssql service |
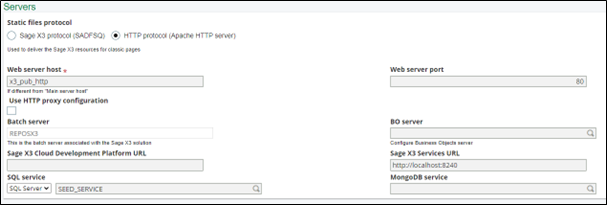
If the Sage X3 Services URL is not displayed, select the Default authoring.
Configure the SOAP pool
Since 2024 R1, this configuration is not required anymore.
You need to configure and start a SOAP pool for the X3 endpoint that will be used by Sage X3 Services integration. For further information, consult the Classic SOAP pools configuration documentation.
If you have multiple SOAP pools for a given endpoint, the first one is used.
Update a previously installed version
Follow these steps to update the Sage X3 Services component:
- Save a backup of your previous version.
- Open a PowerShell prompt with administrator privilege.
- Enter the following command from the target folder:
PS D:\SageX3\x3-services> .\uninstall.ps1
Uninstall complete.
- Follow the installation procedure.