Production label printing
Use this transaction to print production labels at any time. For example, you might need to print again labels that were already automatically printed from production transactions. You might also find it helpful to print labels in advance with data that is not yet recorded in Sage X3.
Prerequisites
In Sage X3, perform the actions described below:
Functional prerequisites
Mobile Automation setup (FUNADCSEARCH)
Open: Setup > Stock > Mobile Automation setup
In the Labels section, perform the following actions:
-
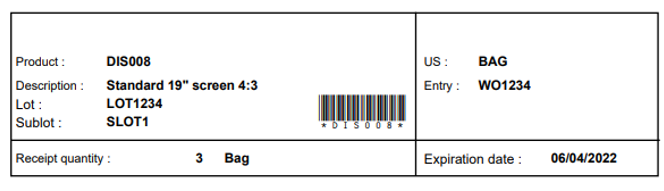
Select the report to use for printing manufacturing labels in this transaction. It can be the same report for all sites or a specific report for each site. You can use the standard Prod. labels on demand report (ETIQONFLYPROD).
Note - errorIf no report is selected, the following error message displays when you open the Production label printing transaction: "No label destination defined.". -
If you select the Always label destination checkbox, the default Label destination printer defined in the Print destinations user settings is always used. If you clear the checkbox, you can change the Label destination printer in this Production label printing transaction.
Refer to Mobile Automation setup (FUNADCSEARCH) in the Sage X3 prerequisites.
Note - errorIf this checkbox is selected and there is no Label destination printer defined in the settings, the following error message displays when you open the Production label printing transaction: "No label destination defined."
How to print production labels
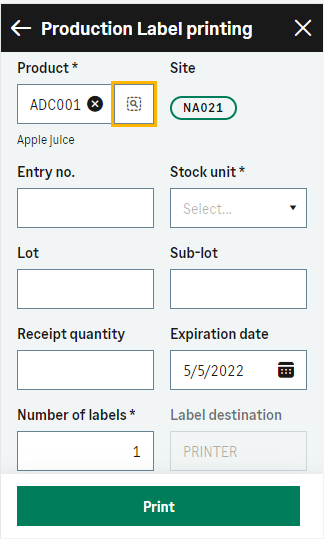
Open: Other > Production label printing
Operating mode
- Enter the information you need to print.
- Select Print.
Step by step
 |
|
