


Processes
A process is a chart that you use to:
- Describe a specific flow involving Sage X3 functions.
- Provide direct links to access these functions.
You use this function to create your process, using a visual editor.
You must then link your process either to:
- A landing page gadget
- A process menu

Prerequisites
Refer to documentation Implementation
Screen management
Header
Fields
The following fields are present on this tab :
|
Code identifying the process. |
|
Legislation code associated with the process. |
|
Language used in the process. |
|
Use this field to assign a description to each record. |
Close
Tab Description
Fields
The following fields are present on this tab :
Block number 1
|
Type of process:
|
|
Enter an access code for the selected screen field, if needed. |
|
|
Description
|
Description of the process in HTML format. |
Close
Tab Drawing
Presentation
Visual editor for processes
Shapes
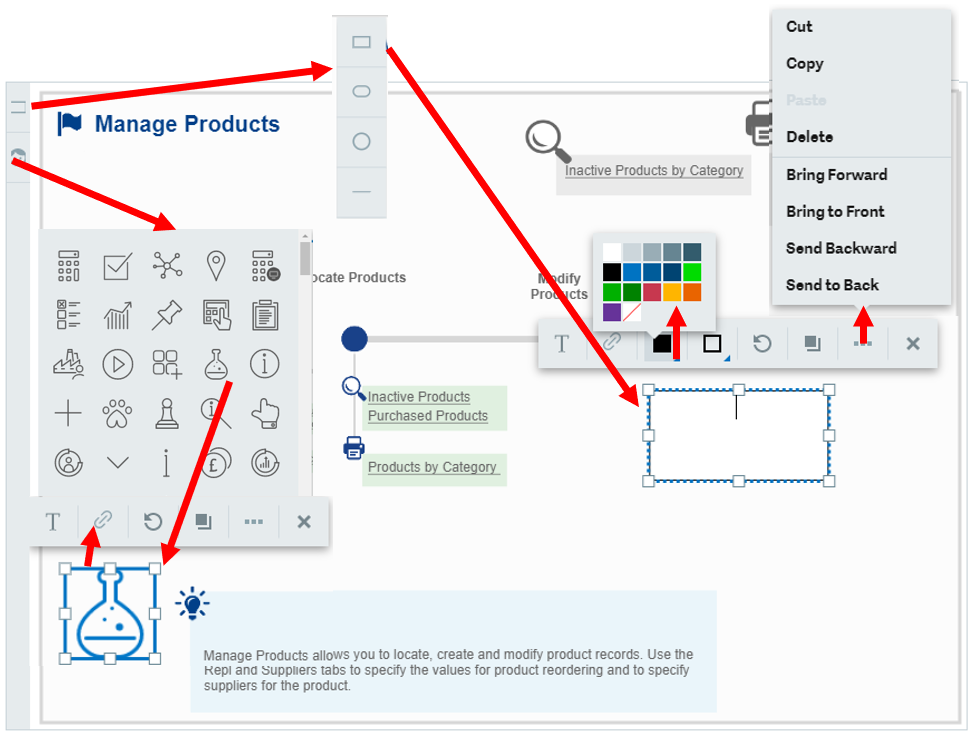
Click the  action to add a shape to your process.
You can add:
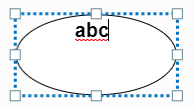
- A rectangle
- An ellipse
- A circle
- A line
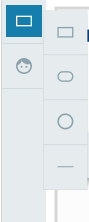
Once a shape has been added to your process, you can change its size using the handles displayed on its borders.
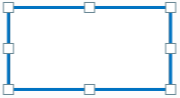
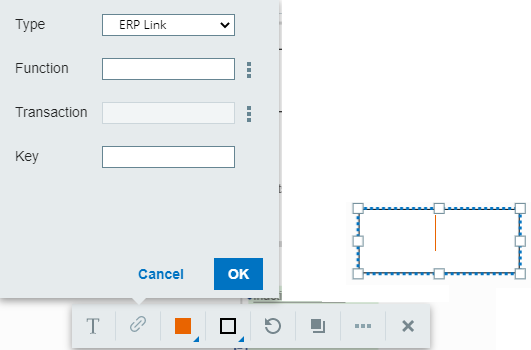
This tool bar is displayed when you select a shape:

From this tool bar, you can:
| Actions | Images |
|---|---|
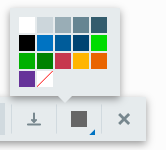
Select the filling color of the shape. |
|
Select:
|
|
Pivot the shape by 45 degrees. |
|
Double-click the shape to insert a text. Press Enter to save your text. |
|
Format your text by choosing:
|
|
| Add a hyperlink to a shape. |
|
Right-click the shape or click  to perform these actions: to perform these actions:
|
|


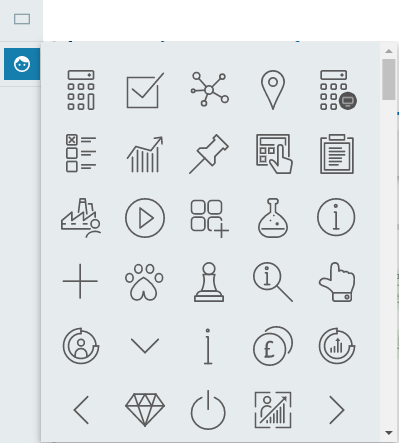
Icons
Click the  to display the list of available icons. Once an icon has been added to your process, you can change its size.
Close
Fields
The following fields are present on this tab :
Block number 1
|
Select a module for the setup. Use this field to specify if the screen has to be created in the folder database. This is the case when the module linked to the screen is active on the folder. |
Block number 2
|
Visual editor for processes. Refer to the online help on the Drawing section for more information on this editor. |
Close
Design and use tips
- When entering descriptions, you must start typing in the middle of the text, not from the first character, in order to maintain the formatting.
- Group the objects to be moved together in order to maintain the page layout.
- A text area, for example Follow the guide, can be used to briefly describe the process and related functions.
Remarks
You can create additional picture libraries on the application server to access custom pictures such as logos, photos, or charts. This is described in this technical appendix documentation.